5 Useful Tips for Navigating (Without a Map, Compass, or Cell Phone) in the Wilderness.
Wouldn't it be perfect if we all knew exactly how to navigate in the wild or backcountry without our cell phones? Many venture out with just that in mind. Yet with more people surging out into national parks and wilderness areas than ever before, search and rescue is often overwhelmed and overtasked with locating those who couldn't find their way.
The truth is, when you don’t know what to look for, you can quickly get turned around, going in circles or meandering deeper into the wilderness. All the while, you think you’re heading back towards the road. Eventually, you’ll start to feel that growing sense of panic that comes with the realization that you don’t know where you’re going.
In this article I will outline my top five most useful and easy tips for off-trail navigation that I use every time I’m in the backcountry.
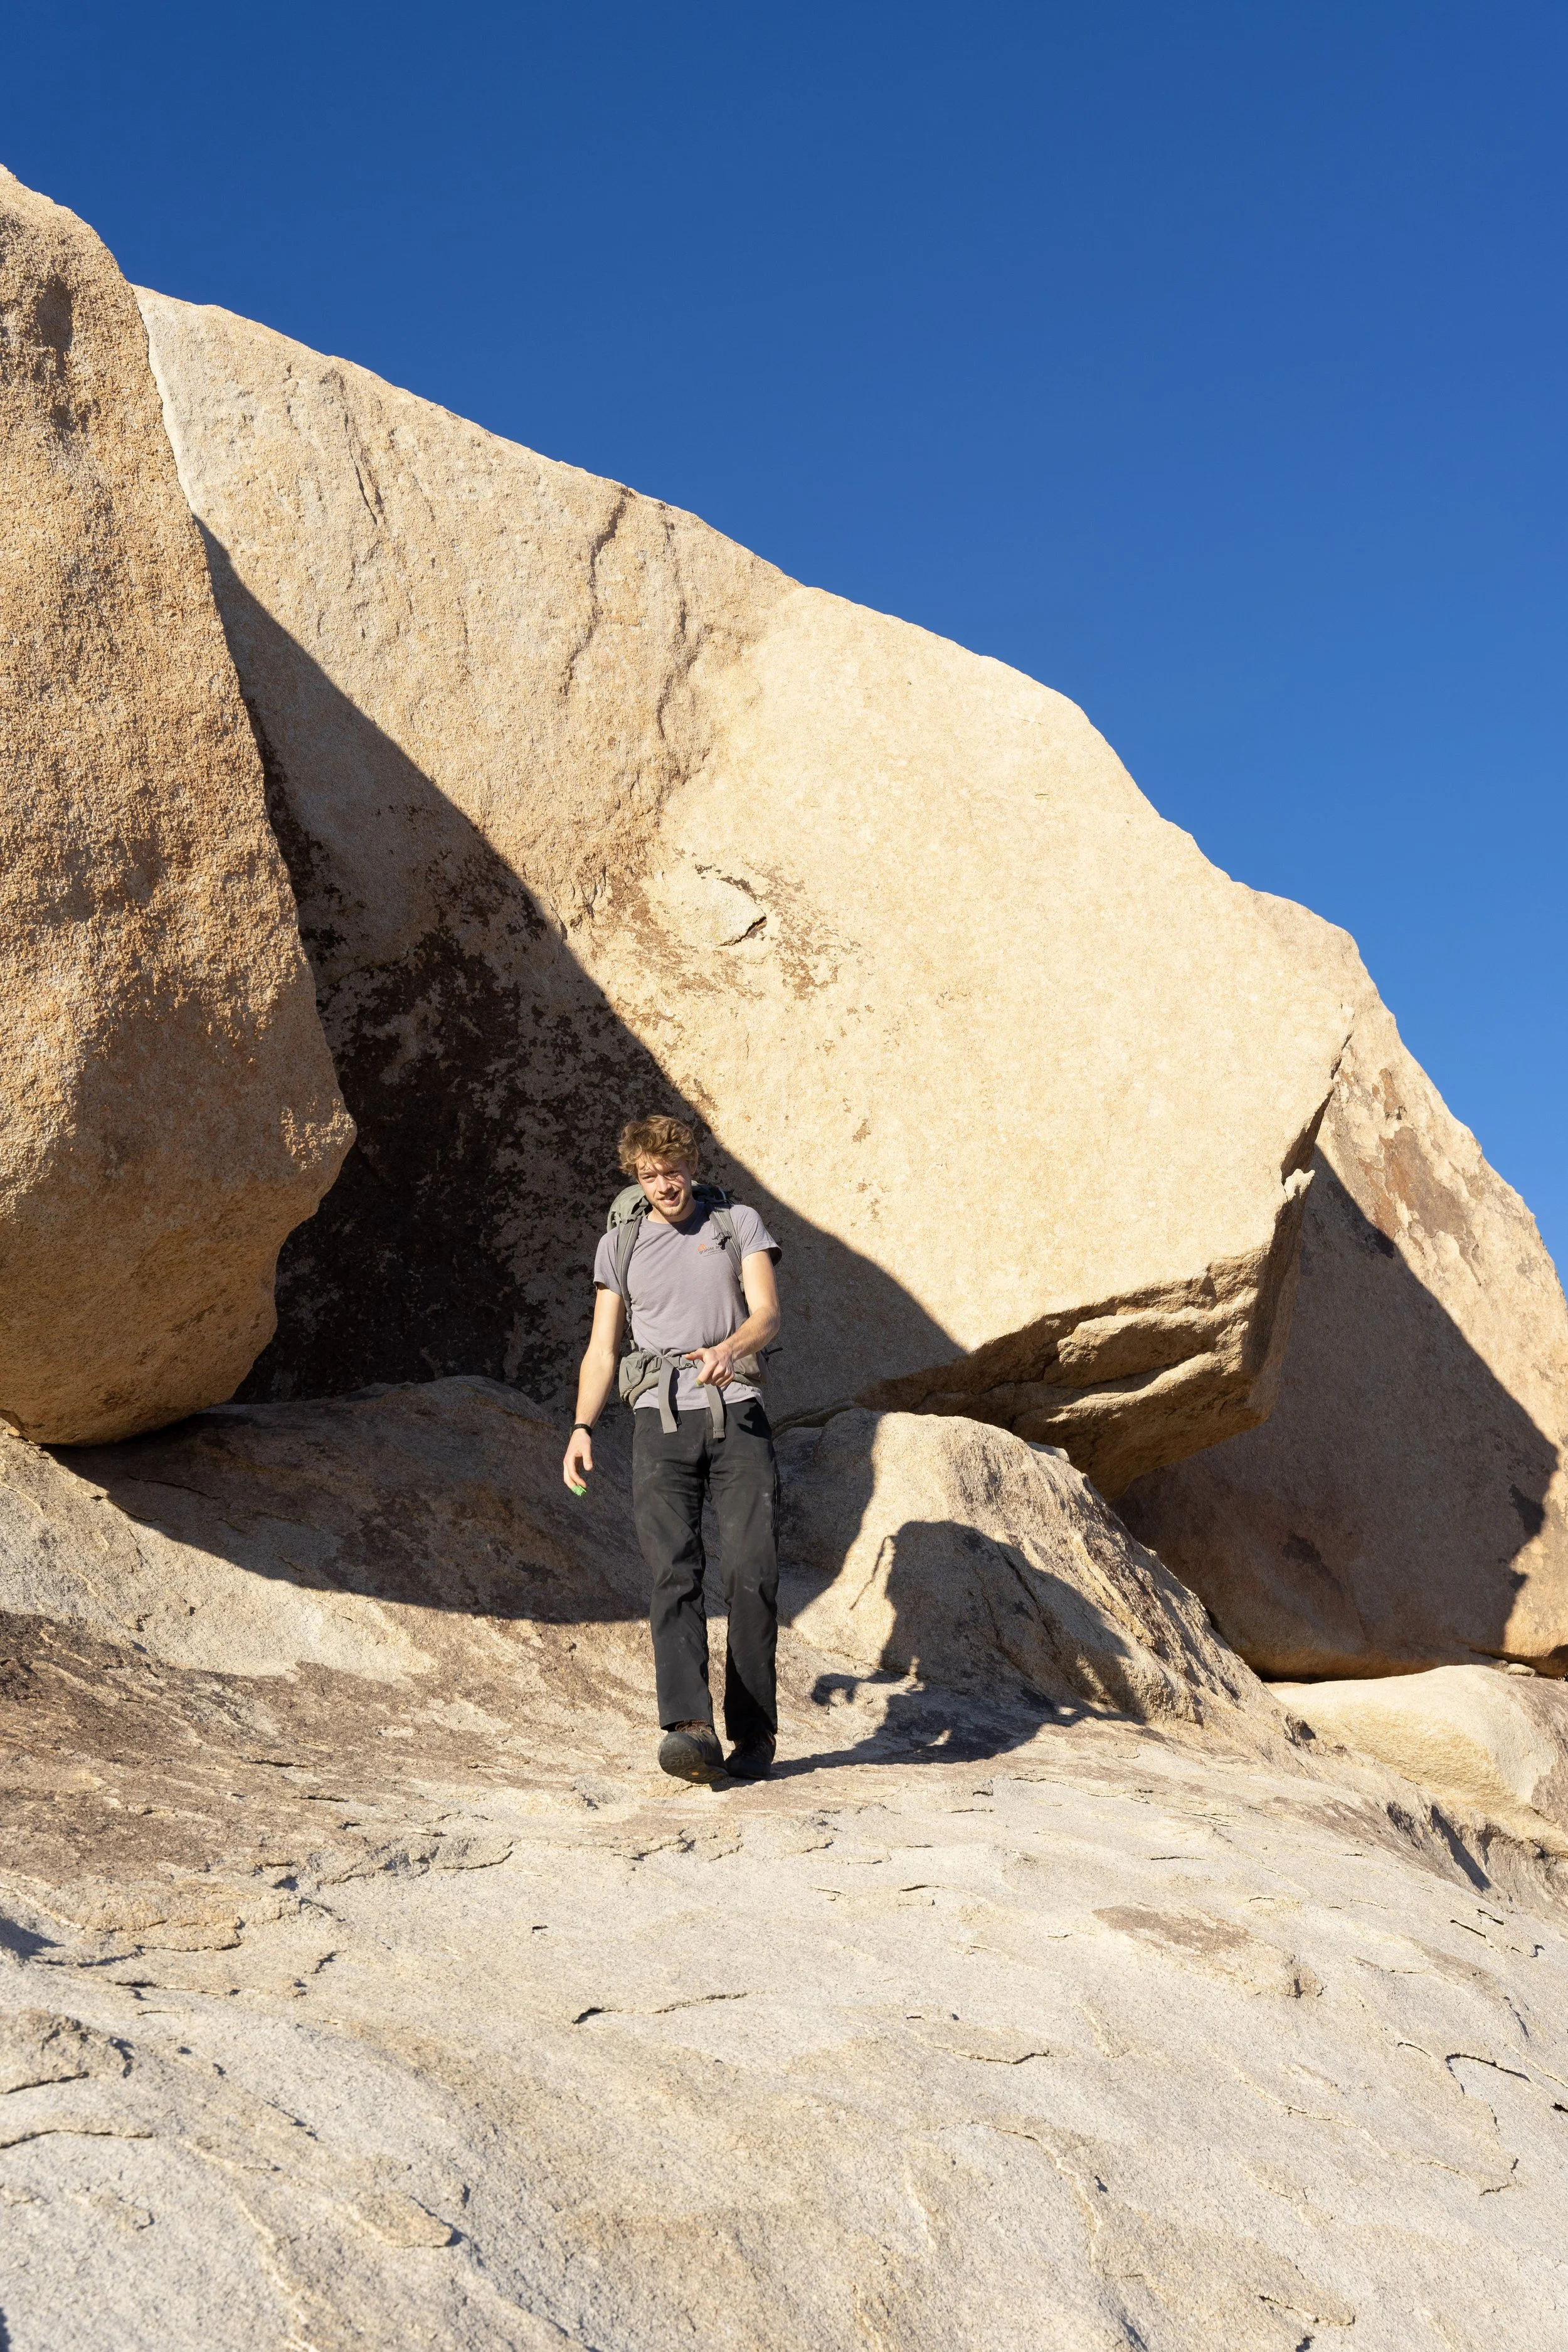
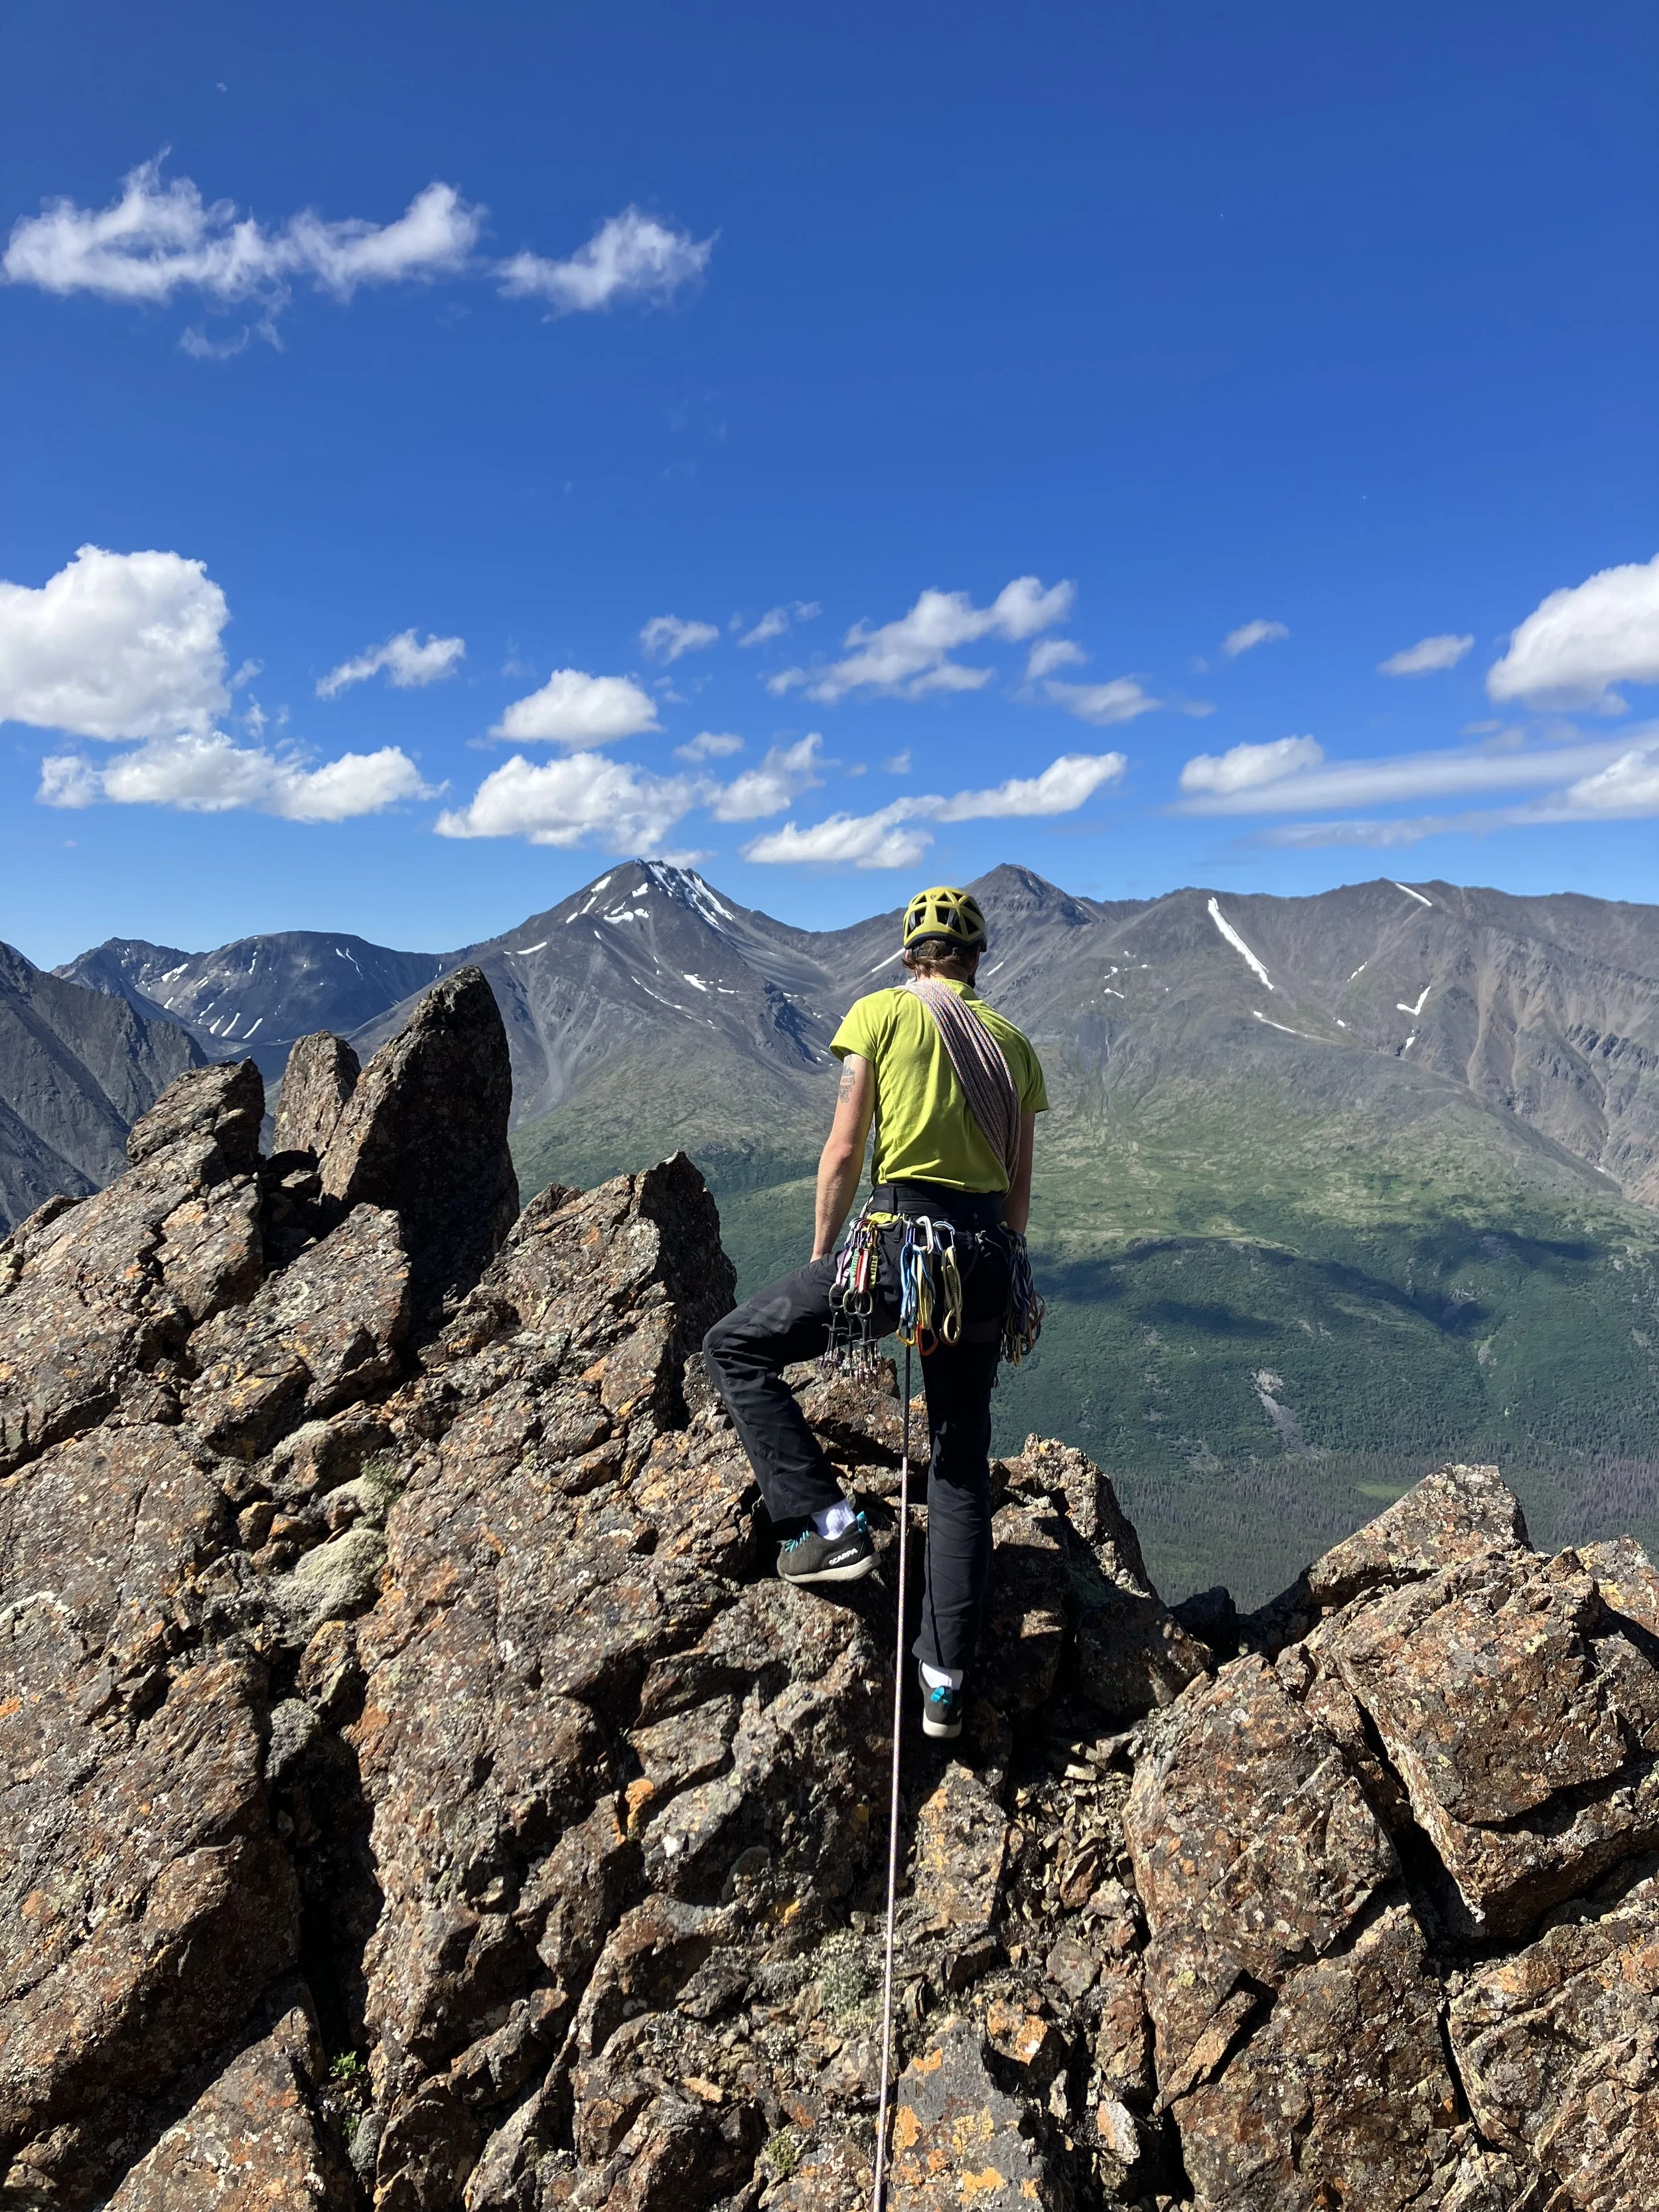
I have honed my natural navigation skills in many climates and areas, from the Alaskan tundra to the deserts of Nevada, Arizona, and California. I have completed multiple trips of 30+ miles without the use of a map, compass, or even a cell phone. I now run a guiding company in Denali, Alaska, offering some of the only options for entirely off-trail excursions in the area. I have learned quite a lot about what to do (and what not to do) when navigating in the wilderness, and now I want to impart these lessons to you.


Let’s get right into it!
Landmarking
What is Landmarking?
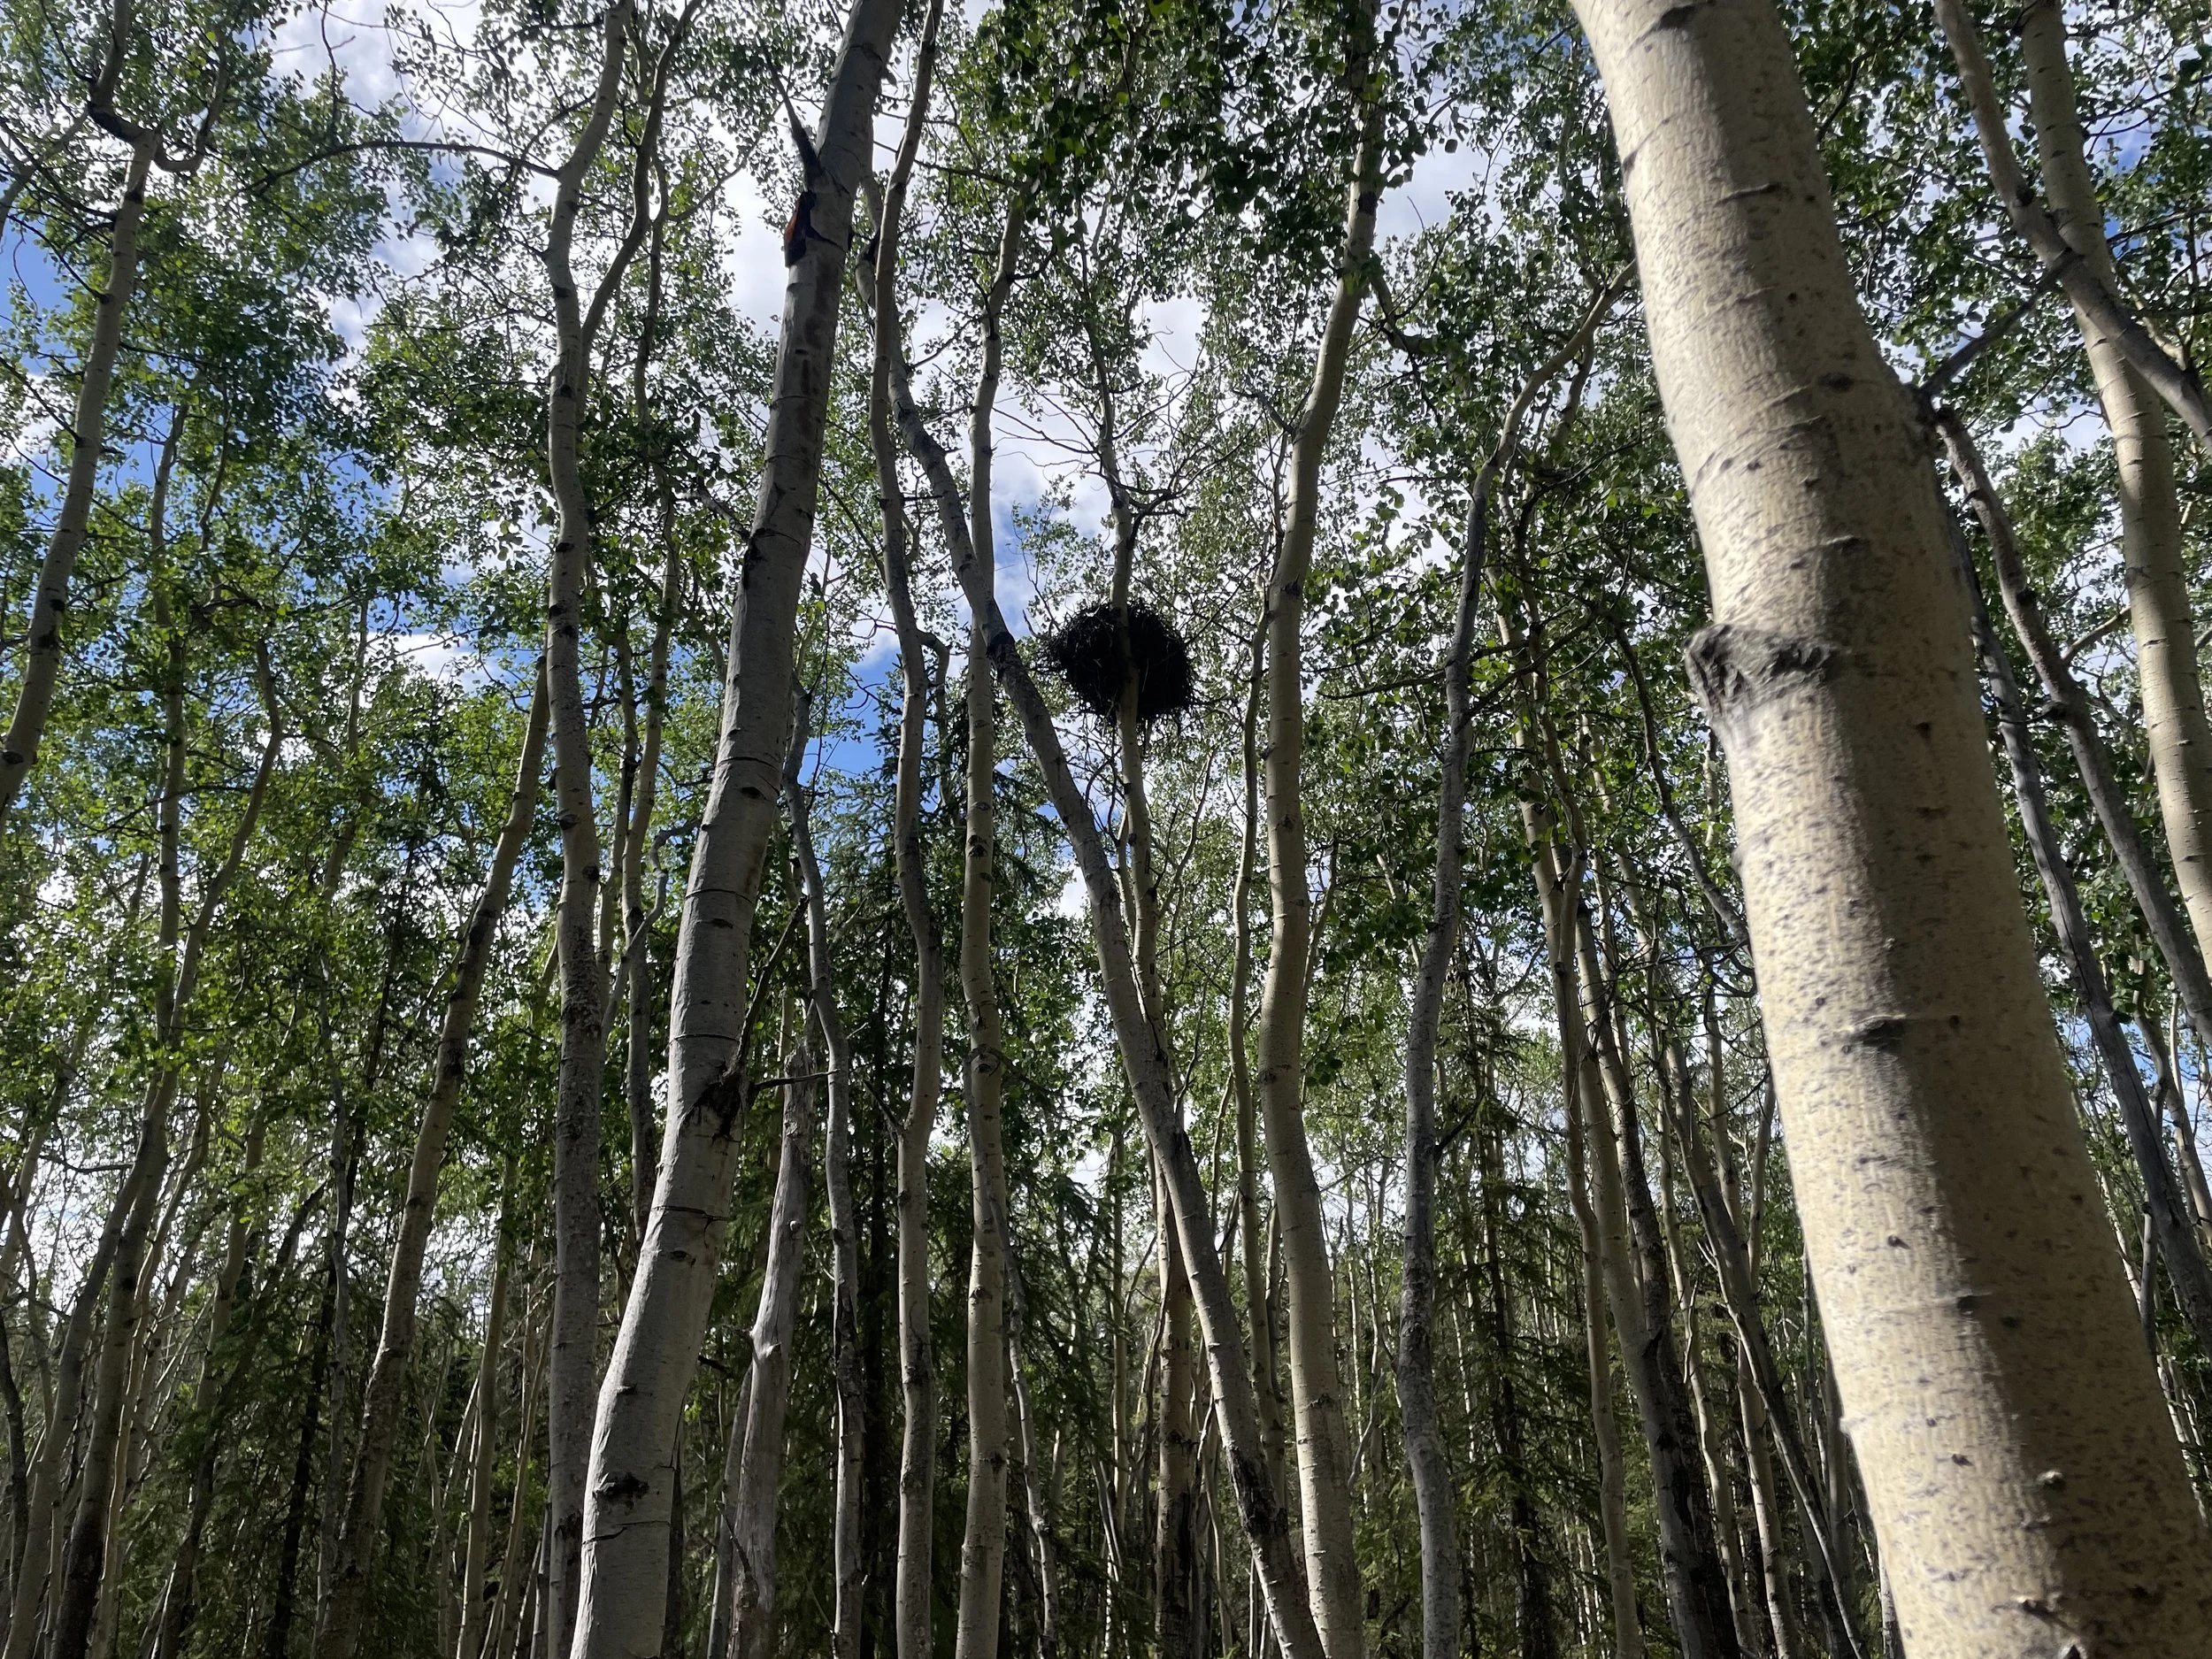
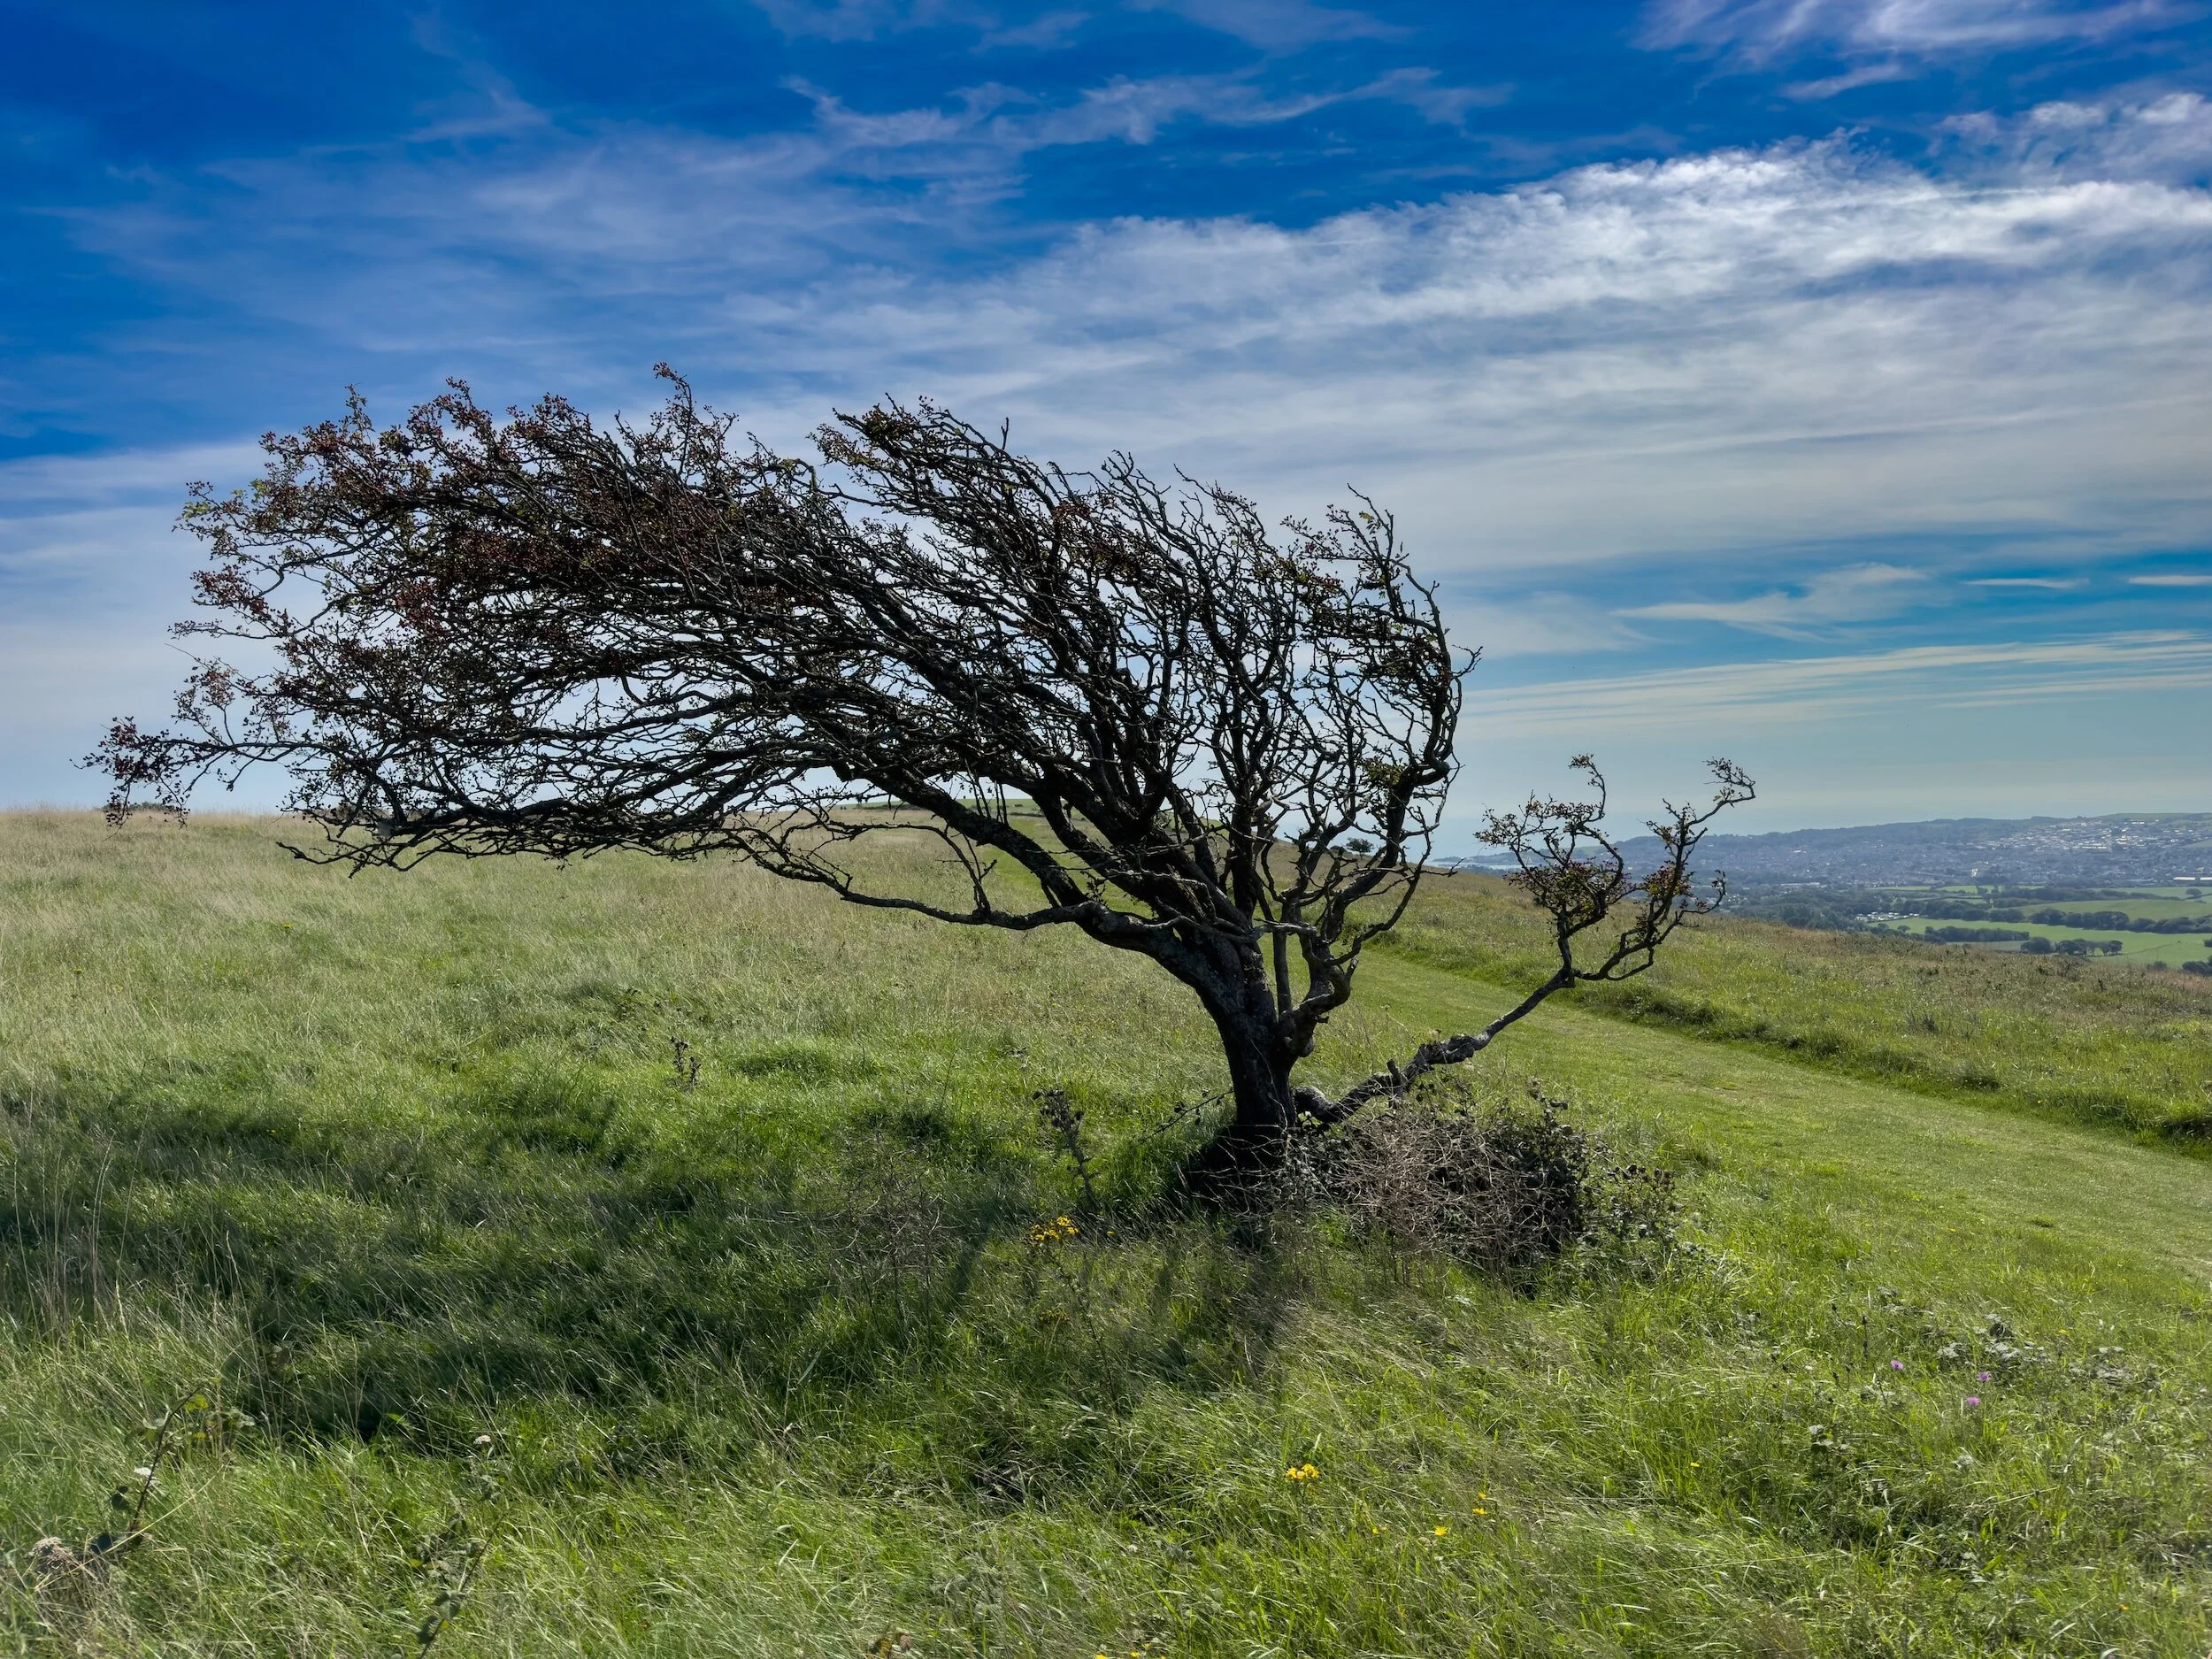
Speaking simply, landmarking is the use of landmarks. It sounds obvious, and it is, but there’s a lot more to it than most would think. For instance, maybe you’re using a tall pine tree as a landmark. It’s easy to see, until you walk into a dense thicket of alder trees and completely lose sight of your landmark. Now what do you do?

The Close-Middle-Far (CMF) Principle
In years of navigating in the backcountry and researching how to do so, a consistent complaint I had was the lack of information on how to actually move through the wilderness. There were endless tricks to find the cardinal directions or avoid getting lost, but there was almost nothing on intentional and practical wilderness navigation. For this reason, I developed the CMF principle. This method is used by backcountry navigators all over the world, and is by no means a new thing, but I haven’t seen it put into writing for those trying to learn basic natural navigation until now.
If you can train your brain to do this one thing, you will automatically increase your effectiveness in backcountry navigation by orders of magnitude. It is especially important in forests, valleys, or any area where your vision is frequently obscured. The CMF Principle relates to the three distances that your eyes should be scanning, and what your brain should be taking in and making sense of at each of these points.
Close

Close refers to the 25-50 feet in front of you. The main things you should be looking for here are things that could trip you or twist an ankle, obvious obstacles, and which path you can take to minimize bushwhacking and maximize speed and efficiency. “Close” range is optimal for spotting game trails, as they are usually very difficult to see until you are nearly upon them.
Middle
Middle is perhaps the most important (and most difficult to master) distance in the CMF principle. It refers to the terrain between 100 and 500 feet in front of you. In this zone, you should be looking for smaller landmarks that you will be able to keep a line of sight on as you get closer to them. These landmarks will keep you going in the direction you want to, even when more distant landmarks become obscured by trees, bushes, or hills. Always make sure to pick out your next landmark before you reach the one you picked last, as having that last one for reference will help you keep the new landmark closer to the line you want to take.
Another thing to pay attention to in this area are the starts of gullies or ridges. I will talk more about how to use gullies and ridges for navigation later in this article. For now, however, we will focus on how to spot them. In the “Middle” area, the beginning of a gully or ridge will often look like a slight downward or upward slope as opposed to the ruggedness that we often associate with these features.
The last thing I look for in this area are clearings or small hills. These points can often afford you views of your “far” landmarks, keeping you on the right course and helping you plan your path going forward. I generally won’t go much out of my way to reach one of these points, but if it’s anywhere near my planned path, I will definitely veer off to take a look around.
Far
Far is what people usually think of when they think of landmarks. This distance refers to very large and/or tall objects in the far distance (500+ feet away). For me, that usually means mountains or very large hills. I should add a cautionary note to using hills as landmarks. Often, hills can be very large or nondescript. A glacial moraine, for example, may be over a mile long and the same height across the entire thing. This means that if you’re using the entire “hill” as a landmark, you may end up nearly a mile off from where you intended.
Instead, I choose one specific feature on said hill, so that I know that I’m looking at the same hill, and the same spot on that hill, the entire time. “Far” landmarks are often lost when we enter a forest, or go behind a slight rise, so it is important that these landmarks be used together with those at the “close” and “middle” ranges. When visible, they are the most reliable method for maintaining our positioning and bearing.
Finding Effective Landmarks
While anything can be used as a landmark, I recommend something particularly eye-catching. If you’re using a tree as a landmark, you can lose that tree very easily if you lapse concentration for even a couple of moments. One tree tends to look a lot like another. Root balls, squirrel middens, trees with nests or burls in them, or even a unique looking dead snag make for more memorable landmarks if they are available.


Lastly, if you’re starting your journey in the middle of the woods, finding a “Far” landmark can be difficult. Climbing a tree or a small hill is strongly recommended in this scenario, as it will help you get a general position for yourself. Then you can make a plan for where you want to go and how you want to get there. This should be obvious, but if you do climb a tree for this purpose BE CAREFUL! Being injured and lost is much, much worse than just being lost. Something that could seem insignificant any other time, could be deadly in a true no-contact backcountry situation like this.
Game Trails
What are Game Trails?
Game trails are trails that have been created by wildlife. They can make navigation much easier, but using them can also be detrimental if not done correctly. Game trails can be many different sizes and can be created by a wide variety of animals. For this reason, some basic knowledge of the animals in the area you’re navigating can be very helpful when using game trails. Knowing how animals tend to move through and interact with their environment can help you anticipate which trails are likely to aid you and which ones are likely to hinder your progress, or worse, lead you astray.
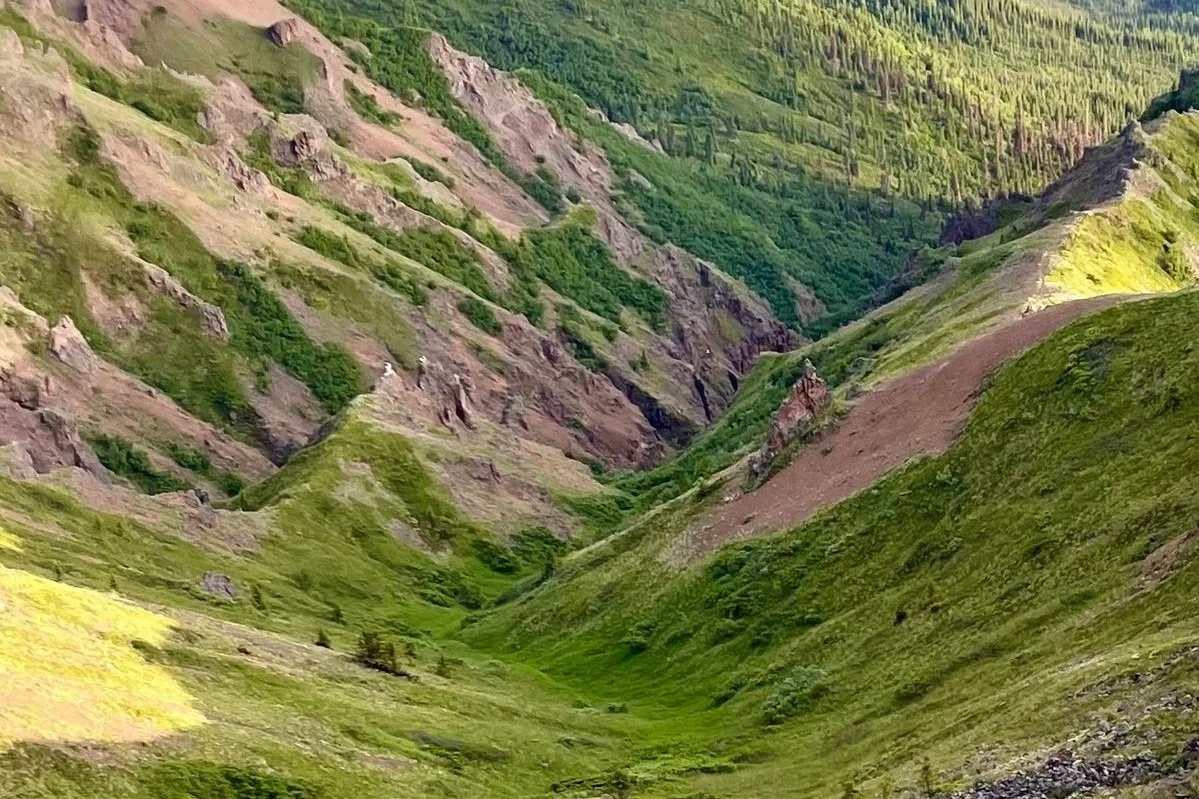
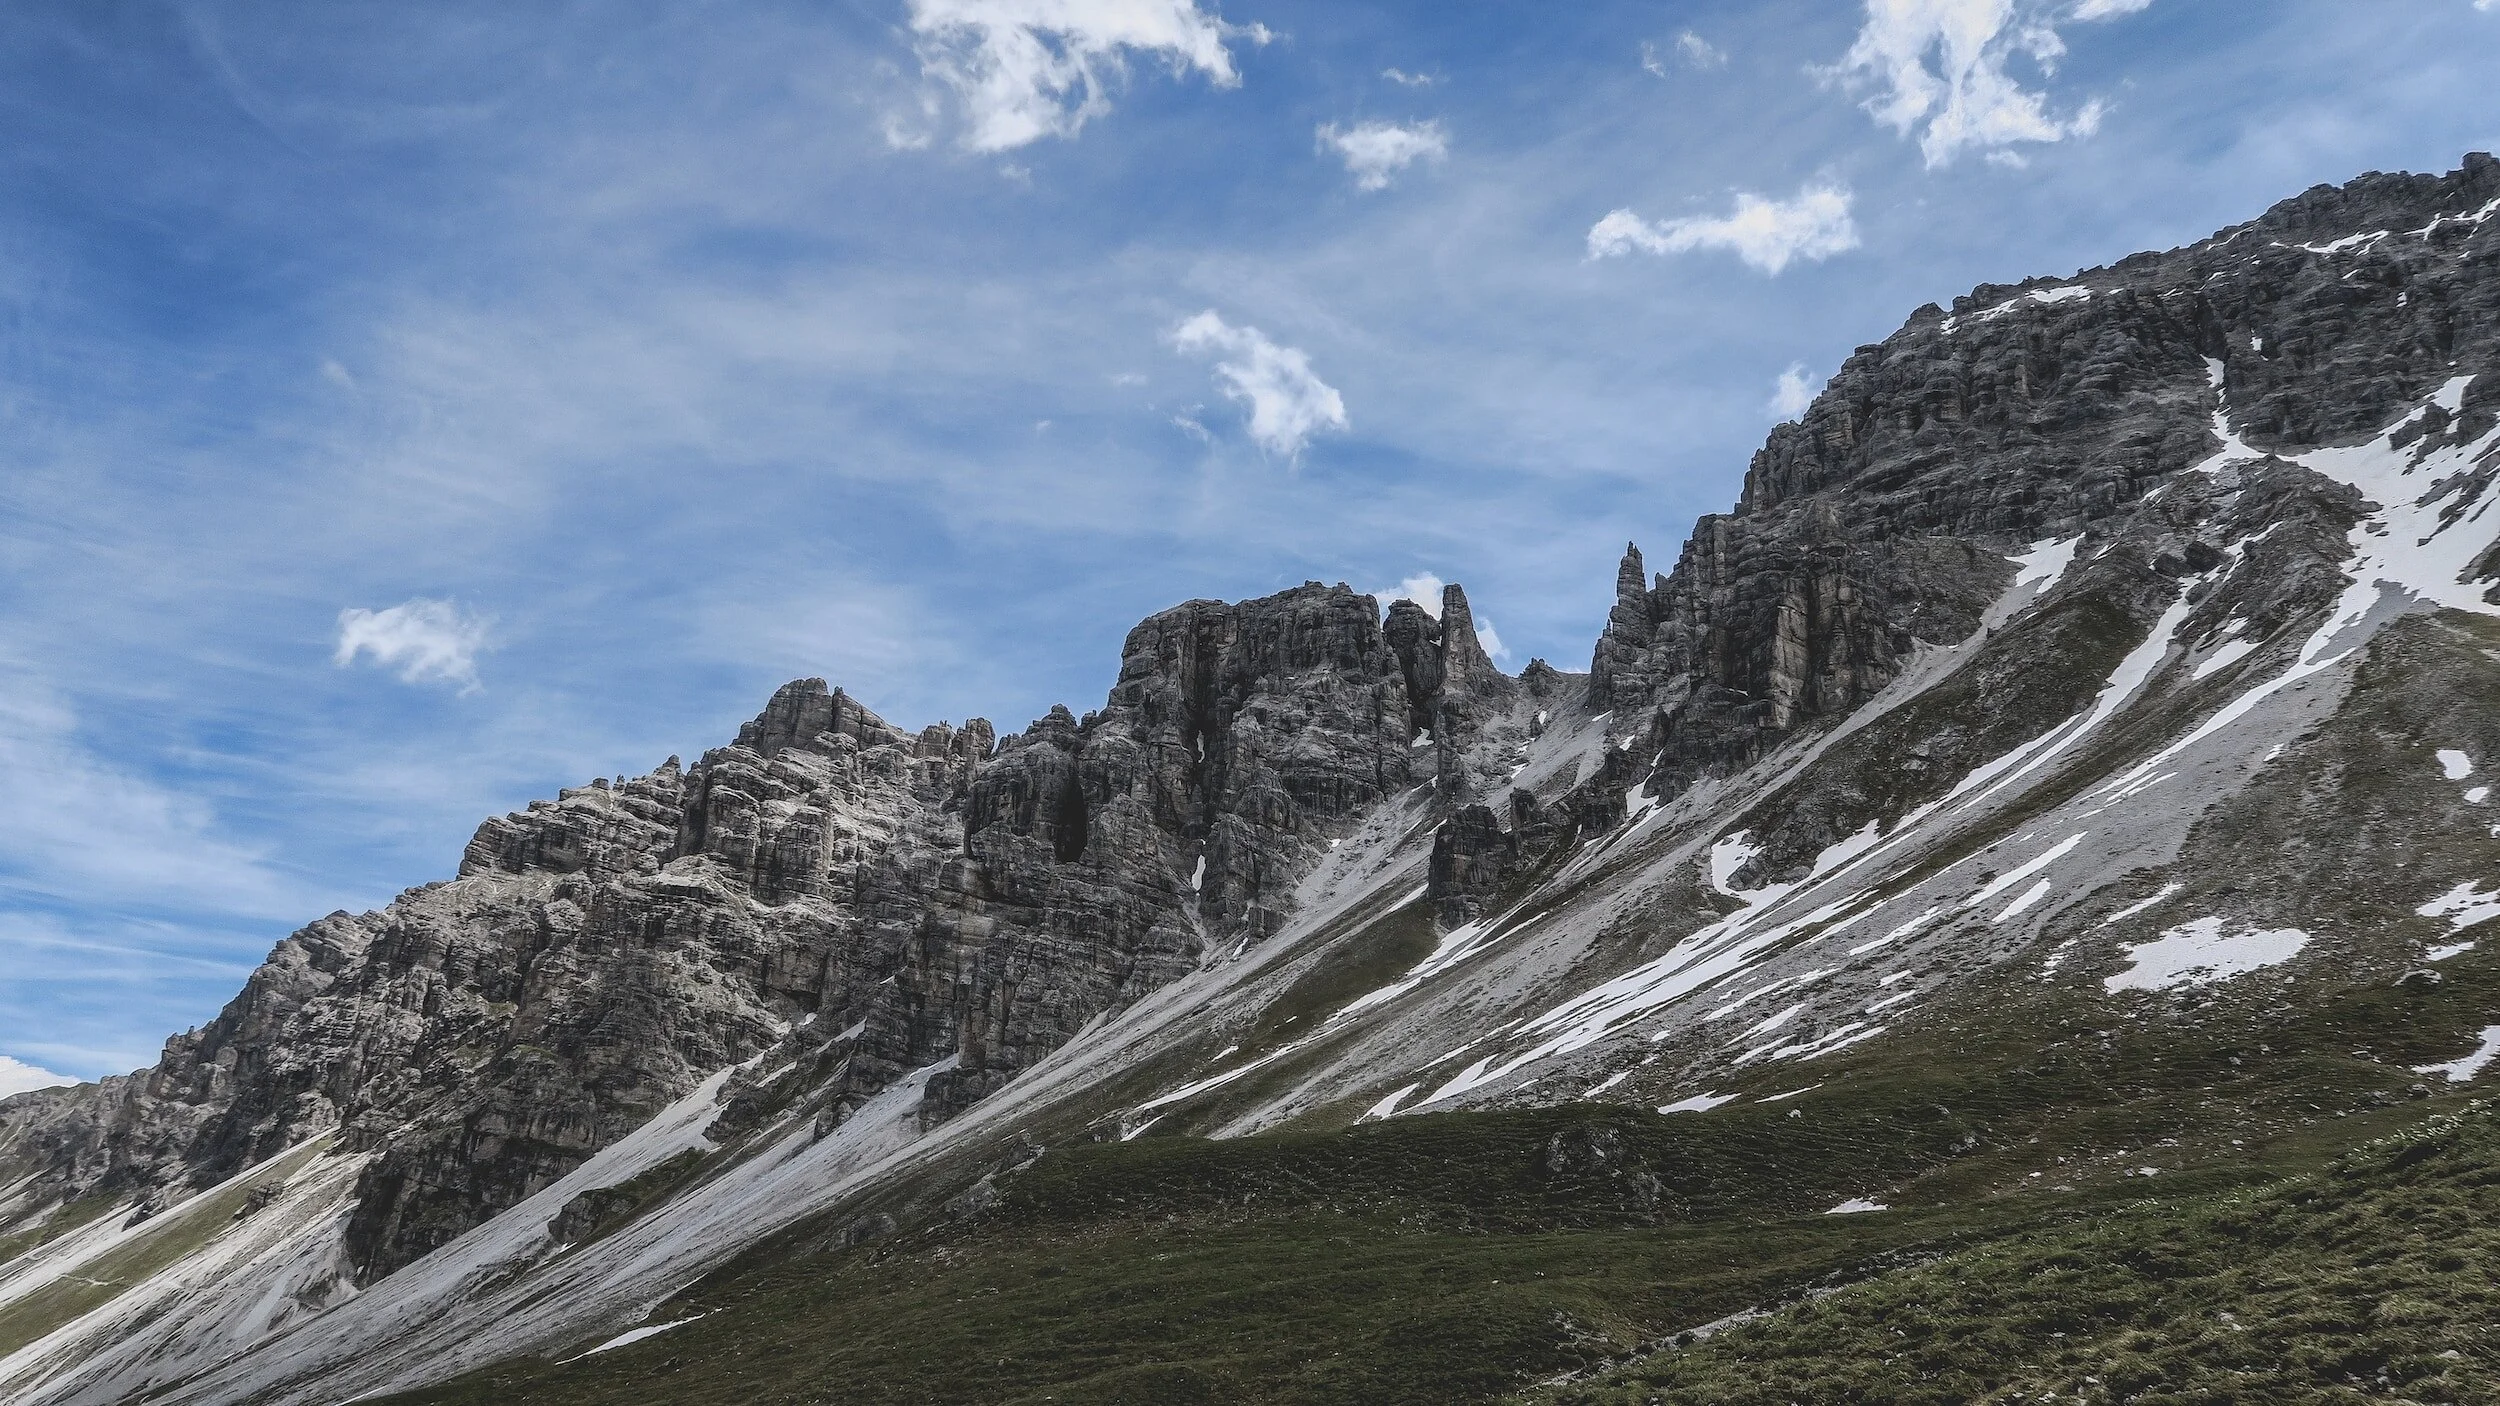
Professional guide, Jordan Allen, navigates a difficult to spot sheep trail high in the Alaska Range. The lack of black lichen on some of the rocks is a telltale sign of a ridgeline game trail.
Animal Navigational Behavior
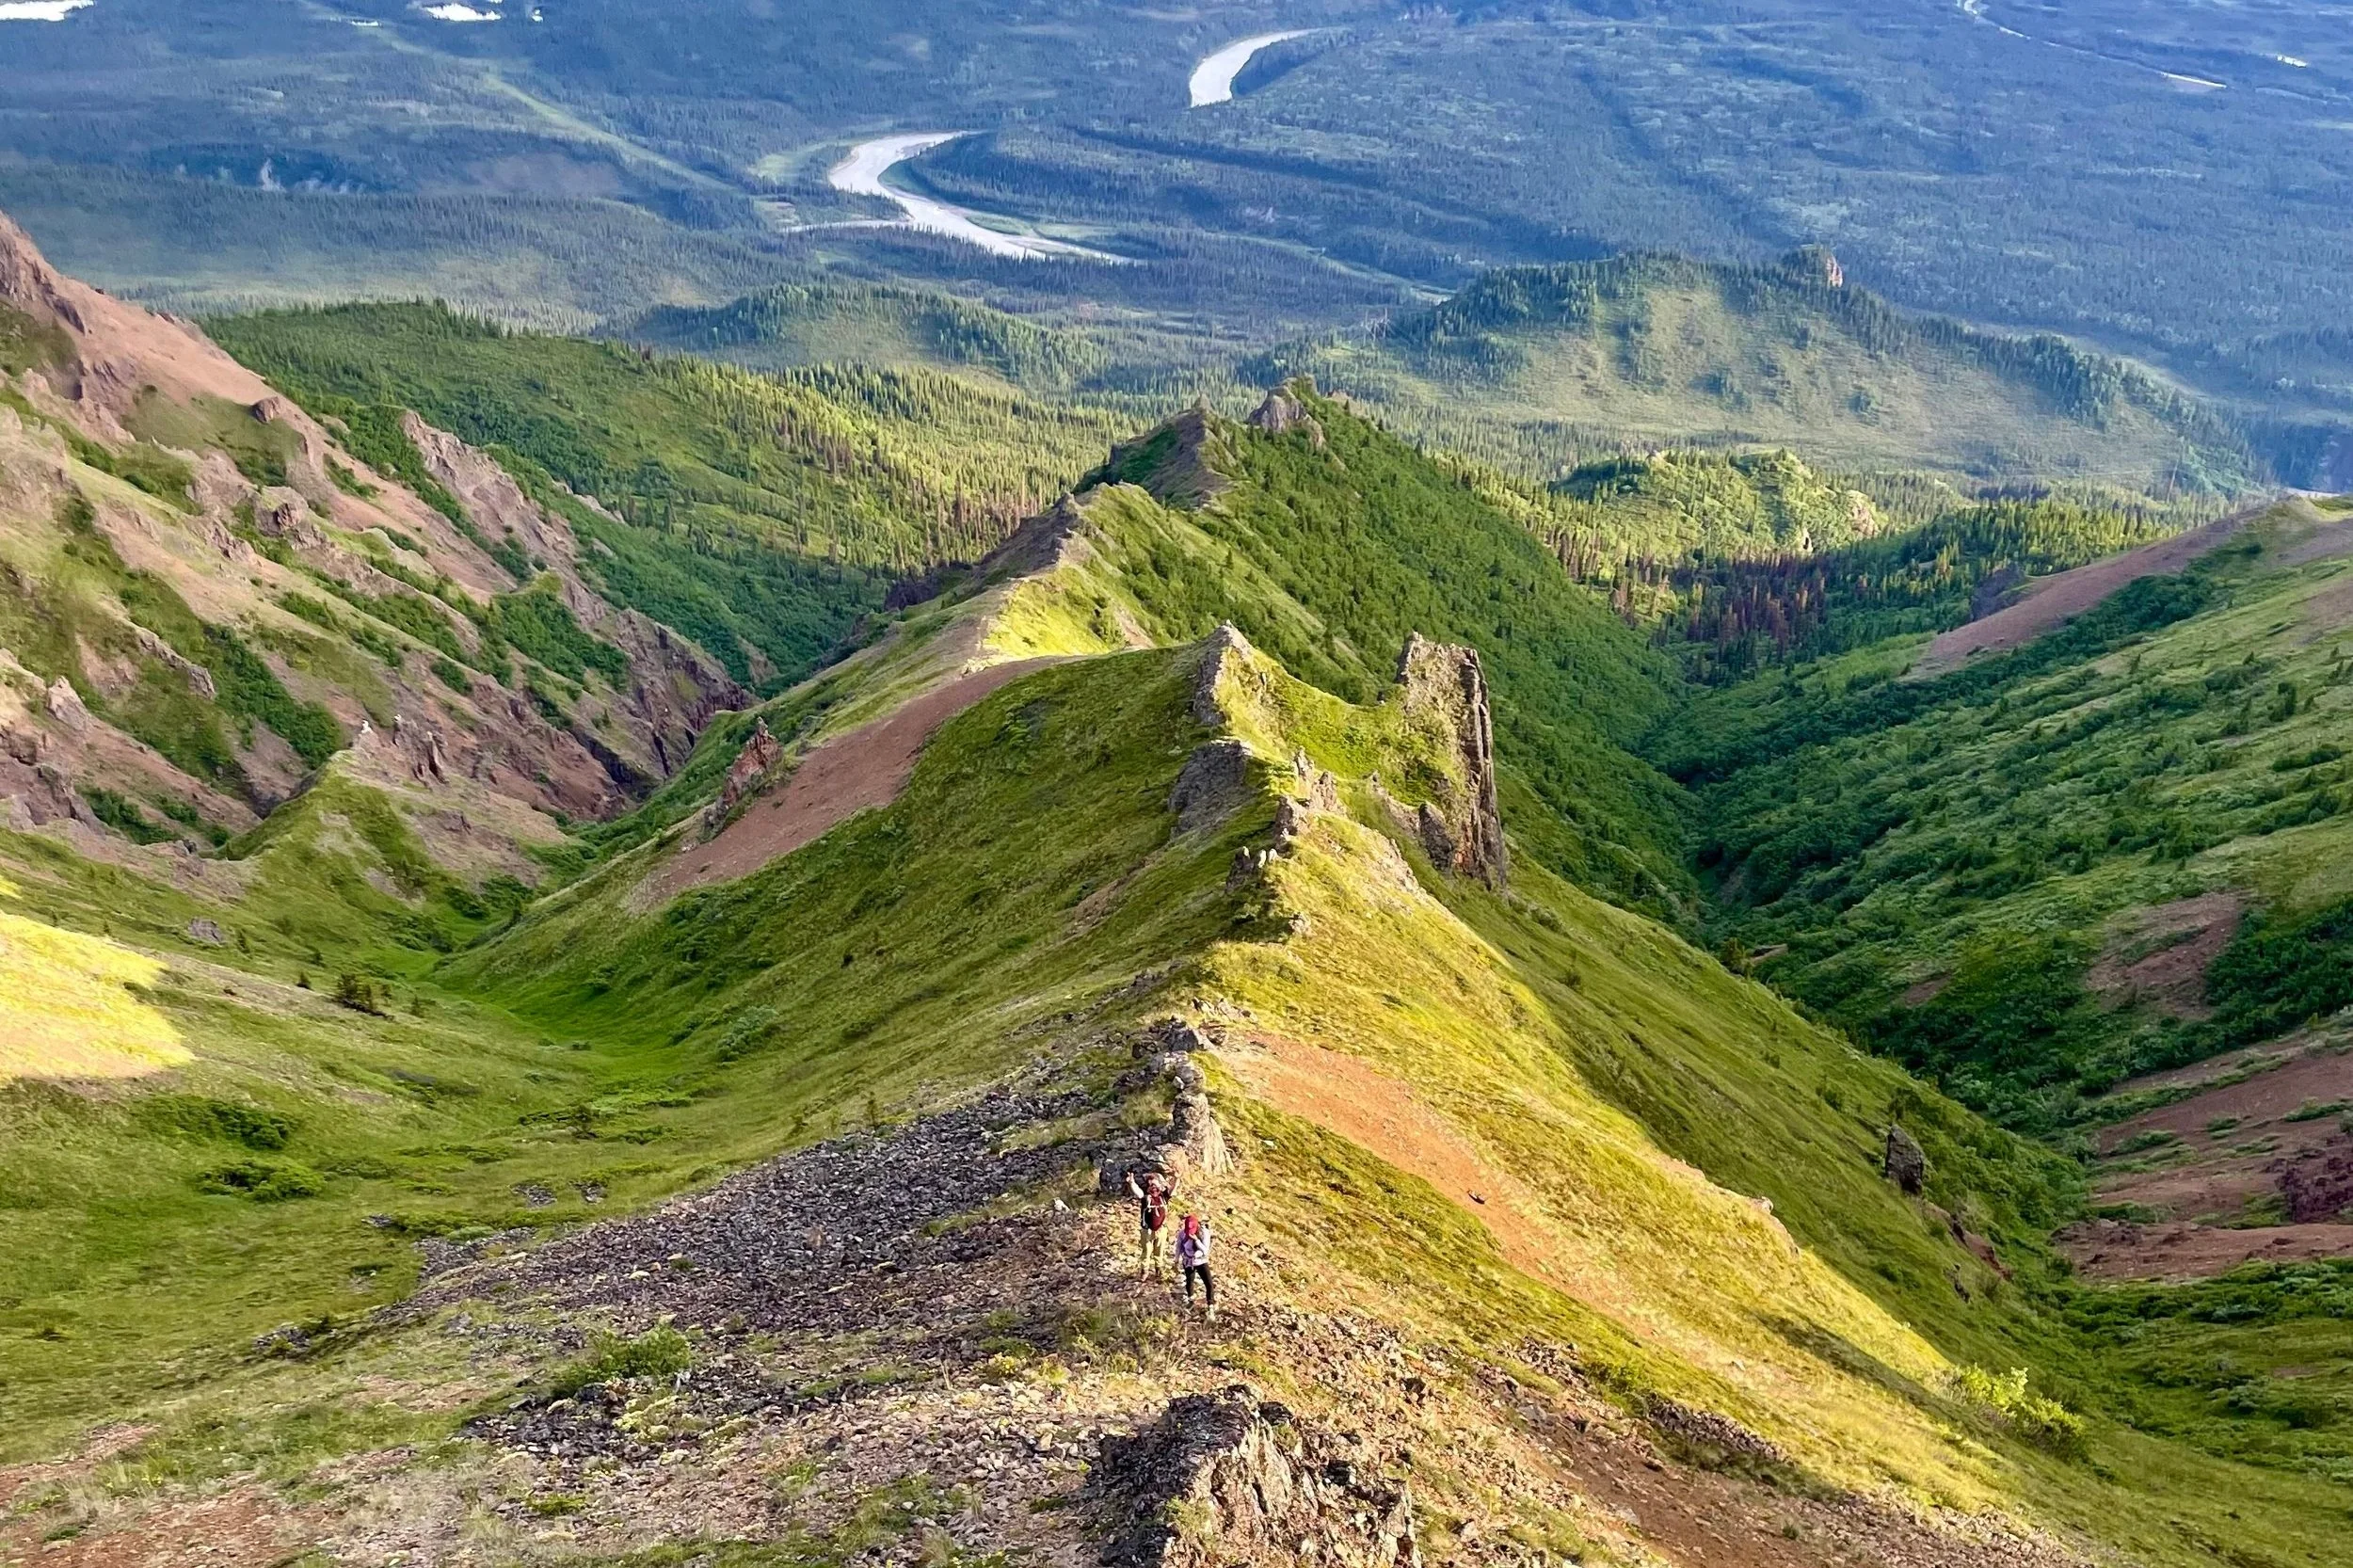
Understanding how animals navigate is integral to the effective use of game trails. While all animals navigate differently, largely according to the area that they inhabit, there are some overarching themes. Animals are usually going to take the most energy efficient route to wherever they’re heading. This means that on valley floors, most game trails are going to follow the lowlands of that valley, often heading towards a water source like a river or creek. In the Mountains, game trails will tend to be more concentrated and heavily used on and near ridges, especially ridges that aren’t particularly difficult to navigate.

There is an excellent example of a Dall sheep trail in the bottom left corner of this photo. As with many sheep trails, this one follows the ridge.
Game Trails to Avoid
While it can be tempting to follow any trail we see, as it makes our job of navigating (at least temporarily) much easier, it can also be very dangerous. One of the easiest ways to get lost in the woods is to follow the wrong trail. When we are on a trail, our minds naturally want to follow it, throwing out any other navigation we had been doing before. All those lovely landmarks we established earlier? They’re gone now! The best way to weed out unhelpful game trails is by looking at where they go.
Game trails can be used very well in conjunction with landmarks. Keeping your landmarks in mind while on game trails is imperative. If you find yourself veering away from your next “middle” landmark, get off the game trail and go back to landmarking.
I cannot stress enough how important it is to avoid getting tricked into following a game trail, or even a human trail, when it isn’t going where you want it to. You must be willing and able to leave a trail when it strays from your landmarks if you are to maintain your heading.
Utilizing Ridges and Gullies
What are Ridges and Gullies?
Ridges and gullies are some of the most common mountain and hill features that you will encounter in the wilderness. Typically, they come together, with two ridges lining a gully. A ridge is a long section of raised earth and/or rock usually leading towards the summit of a mountain. If you are standing on top of a ridge, the ground should drop down on either side of you.
Gullies are the canyons created by the water that flows down these ridges. While the distinction between gullies and canyons is a bit murky and the terms can be somewhat interchangeable, “gully” usually refers to a very small canyon. Gullies often only actually have water flowing through them during the melt or flood season depending on where you are.
Navigating Ridges
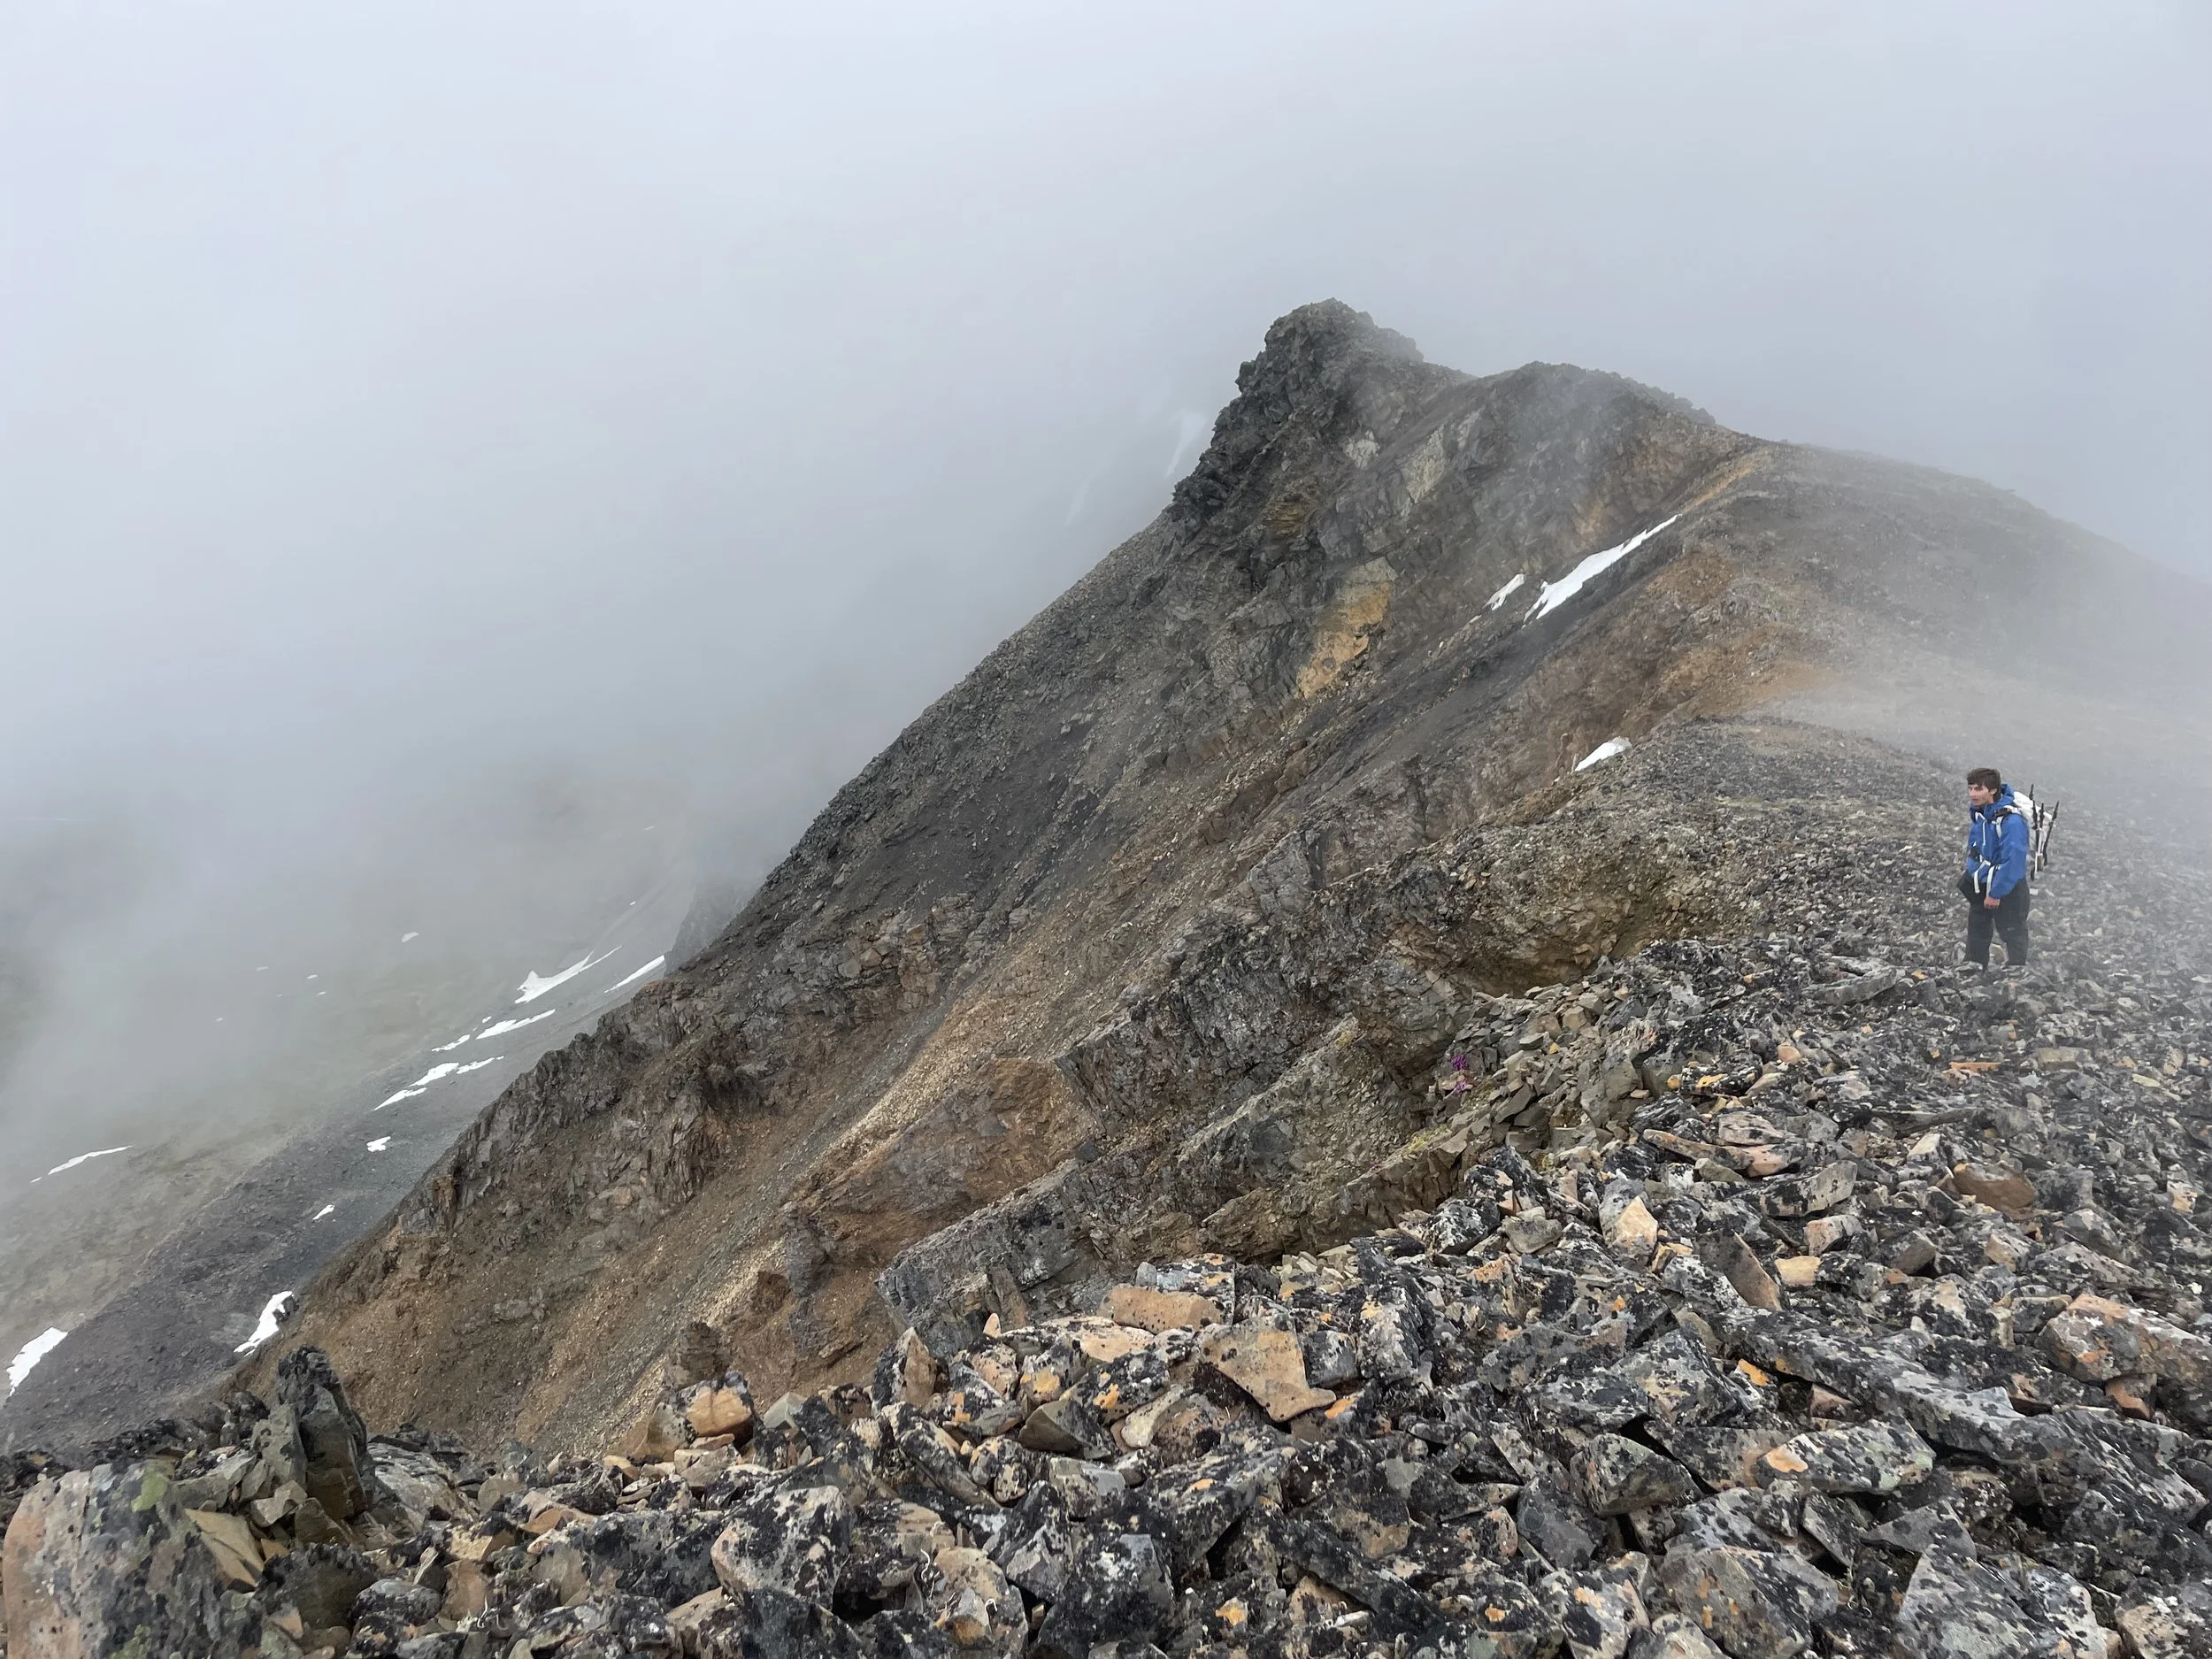
Ridges can be a wonderful and invaluable resource in your natural navigation journey. Not only will they reward you with more visibility, they are also usually the most energy efficient method of travel, especially in very mountainous regions. They usually lead to the summit of a peak, which can offer an invaluable perspective for evaluating where you are and where you need to go. Even when you aren’t in the mountains, ridges can be your friend. Wooded ridges, while providing less visibility overall, are still fairly easy to follow. Once you’re on top of the ridge all you have to do is avoid going downhill to either side.
Flat ridges (ridges that exist in isolation rather than being part of a mountain) are typically quite straight, especially in areas that were partially or fully glaciated at one time or another. For this reason, if you find a ridge going in the direction that you want to go, your navigation will become easier. With all that said, actually following a ridge can be somewhat difficult. Ridges are often very rocky, can have long drops, and frequently present obstacles such as massive rock horns or steep saddles that can make going slow.
Fortunately, practice leads to more effective problem-solving and greater speed. Any outcropping of rock on a ridge will usually come with a way to bypass it on one side or the other. As a general rule, if something sticks up from the ridge, go around it, not over it. Game trails can be well-utilized here, as animals like sheep and goats usually follow ridges too. Keep a close eye out for their trails, as following a sheep trail on a ridge is significantly easier than navigating it yourself.
Navigating Gullies
Gullies are often much harder to move through than ridges, or even the forest around them. Despite this, they can be extremely useful, and I find myself following gullies quite frequently. For one thing, a gully is usually paired with at least one ridge if you go far enough up it, so following gullies can be a good way to find a ridge if you’re in a forest with bad visibility.
Also, gullies often come with a creek. If you follow that creek downstream far enough, it will flow into a body of water somewhere. Following these bodies of water can be an easy way to avoid getting lost. It’s also wise to keep an easy water source near you when possible. When I’m navigating in the mountains, I often do a “gully check” while I’m still up high on the summit or ridgeline. I look for where the various gullies running off of that mountain go. Then I can pick the one that moves towards where I want to go and follow that all the way there, just like I would a trail.
As with ridges, gullies can be hard to move through. Often, they will be choked with trees, brush, wet ground, tall grass, and copious amounts of bugs, all of which can hinder progress. Fortunately, most of these can be avoided in one of two ways. The first is to simply commit to getting wet and walking in the stream. This is often the easiest method, especially when the gully has particularly steep sides. The other method stays dryer, and involves following the gully from a little higher up. This can be tricky, however, as you will sometimes be forced down into the gully and then back up higher again by the changing terrain.
Some Caveats for Navigating with Ridges and Gullies
While ridges and gullies will become your best friends when navigating in the mountains, they are also friends with sharp knives. You have to be cautious. Ridges are usually the windiest part of any mountain, and while that poses the obvious threat of getting blown off of the ridge, these winds can also cause cornices (overhanging, dangerous, and difficult to see snow banks) and other features that should keep your head on a swivel.
Not to be left out, gullies are frequently paired with dangerous whitewater or unstable snow bridges. The risks beg constant consideration if we are going to navigate these features safely. I encourage you to stay off of snow that stretches over a creek or moving water whenever possible and to stay aware of your surroundings at all times.
Finding the Cardinal Directions
Navigating Using the Stars
The stars are the ultimate easy way to find your cardinal directions. We’ve all heard of using the stars to find your way, but few of us actually know how. As an important disclaimer, everything I say here only applies to the northern hemisphere, as that is where I and most of my readers are located. While stars are a wonderful method of finding your way, they can also be rather fickle. Since they’re only out at night, it can be difficult to do any real travel while you can actually see them. Clouds can also make night sky navigation downright impossible.
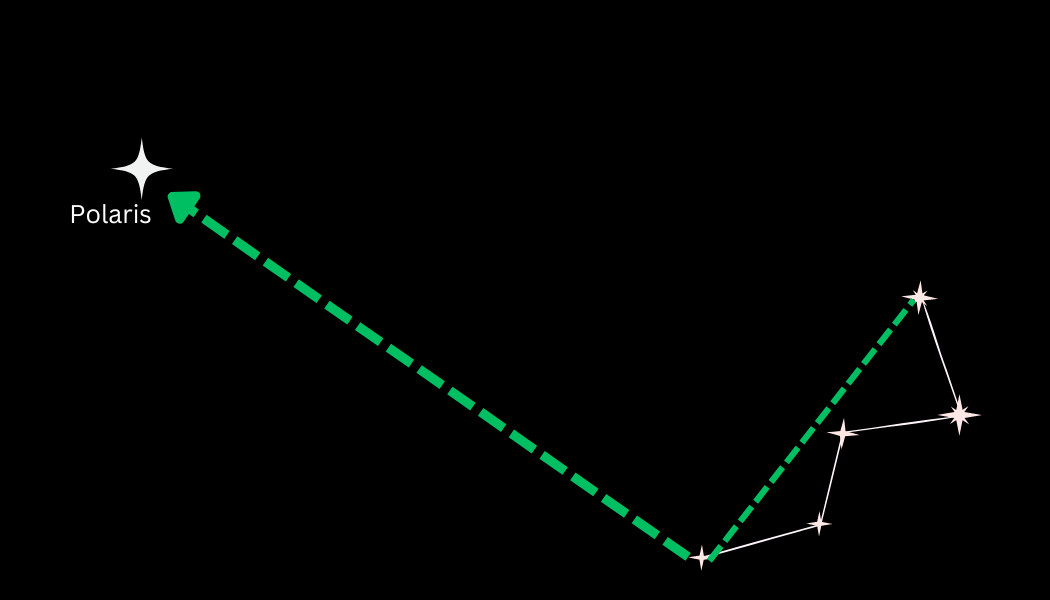
Okay, so the stars aren’t perfect. They can still be incredibly useful. When in the Northern Hemisphere, it’s easiest to look for the Big Dipper or Cassiopeia constellations. These can both be used to find the North Star, Polaris, and one of them is always going to be visible over the horizon on a cloudless night.
In the case of the Big Dipper, follow the line in the image below about four and a half fist lengths (holding your fist up to the sky) to the brightest star in that area. While it is bright, Polaris is far from the brightest star in the sky, in fact there are 47 stars that are brighter in our night sky.

In the case of cassiopeia, you want to look two and a half times the distance between the two furthest apart stars in the constellation in the direction indicated in the image below. Both constellations will lead you to the same place, and constantly rotate around Polaris.
Analyzing Growth Patterns
This is one of my favorite methods for finding direction. It is also one of the most difficult to do well, but it will completely change the way that you look at the natural world. Most of the things that I will discuss in this section only occur because the sun is in the south for those of us in the Northern Hemisphere. This will apply for those in the Southern Hemisphere as well, but all of the directions will be opposite since the sun will be in the north.
Plants like to grow in the direction of the sun, meaning that a plant in isolation will have heavier foliage on its southern side. You will also sometimes see a “check mark” effect in trees, with the branches pointing south being much closer to horizontal, while those on the northern side of the tree will look closer to vertical. This creates a “check mark” with the tail of the check mark pointing south.
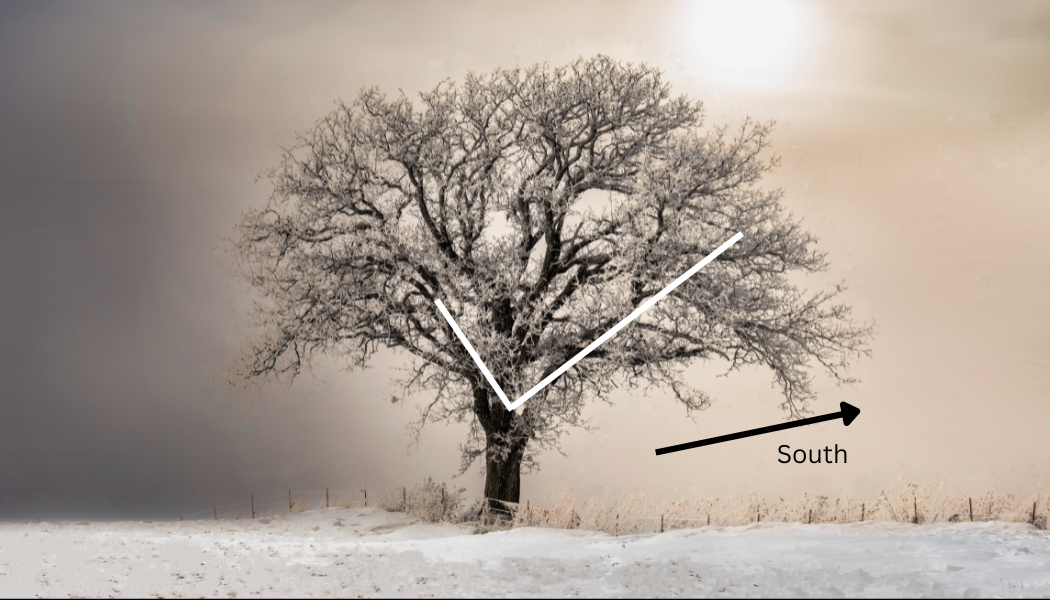
Notice how much more foliage is on the southern side of this oak. The check mark does show up here, but the amount of foliage is the bigger clue.
In the case of aspen trees, they also have a natural sunscreen that they create to protect their thin bark. This sunscreen will show up as a white powder on their green tinted trunk, and will usually grow more heavily on the south side of the tree, as that is where the sun is strongest.
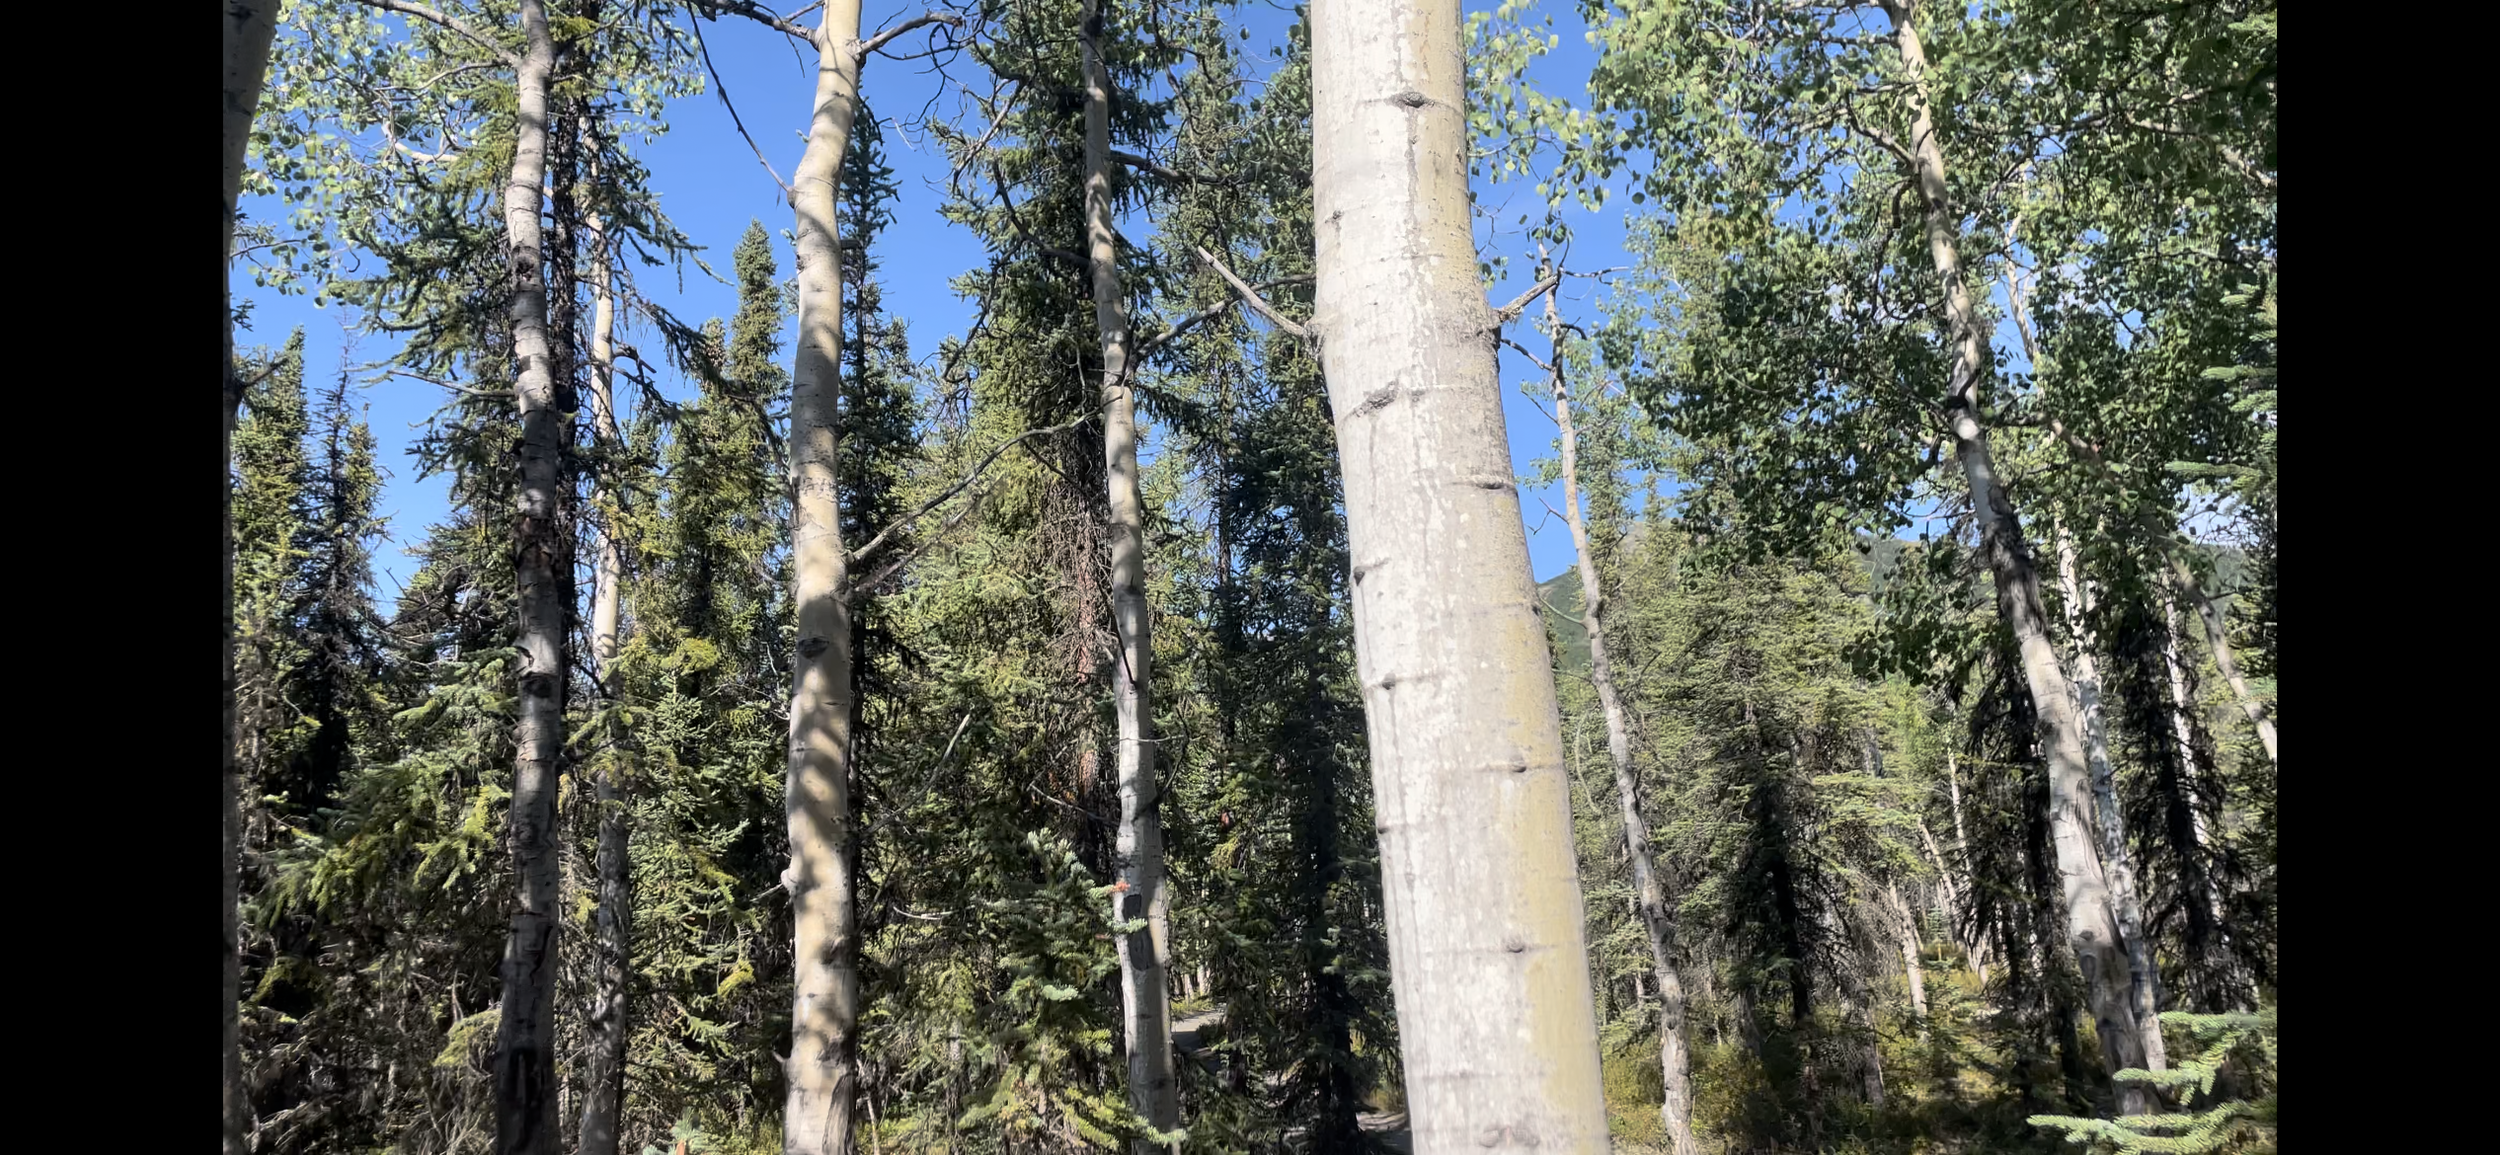
It is important to remember that this only works well in isolation. In a forest, other trees may be blocking the sunlight of the tree you’re trying to use to tell direction. If the tree’s south side is blocked, it may stretch to the east or west instead. For this reason, you have to carefully think through any tree or plant that you’re using for this purpose. I also recommend doing a full 360 degree walk around the tree so as to see it from all angles and confirm which side actually has the most foliage.
Prevailing Wind Direction
Knowing the prevailing wind direction in your area can be very helpful. In any given area, the wind will tend to blow in one direction more than others. This is known as the prevailing wind direction. This will affect the growth of the plants, among other things. I’m sure most of us have seen windswept trees before, either on coastlines or high in the alpine. If you know the prevailing wind direction of the area, telling that direction is laughably easy when you see such a tree. Unfortunately, these cases are rare in forests and other difficult-to-navigate terrain.
In most cases, the trees won’t look entirely windswept, and it will take a bit more deciphering to figure out how the plant is affected by the wind. Plants will usually grow to point their branches and twigs away from the wind, as they are more likely to snap in high winds if they are pointing towards it. Telling direction with the wind can be difficult, and takes a lot of practice, but it’s a worthwhile tool to keep in your toolkit.
Mindset
This section will be different from the other ones. Instead of pointing out “tips and tricks” for navigating in the woods, I’m going to dive into the mindset that you should strive for in wilderness navigation. This section is more nebulous, but also more important, than any of the previous sections.
The Awareness Mindset
Cultivating a mindset for awareness is the single most important part of navigating successfully in the woods. You can do this in your normal life as well, and it will help you there too. Whenever you see something, ask yourself how it got there, and why it looks the way it does. This is truly the backbone of natural navigation. The signs I’ve laid out in previous sections rarely present themselves perfectly, so being able to trace back why something looks the way it does is going to be far more important than knowing any one tip or trick. I know this exercise sounds excessive and difficult, but believe me when I say that it will get easier with practice. At this point I do it subconsciously.
When I started this practice I had to do it very intentionally, and it was exhausting. If you’re going to try to start doing this, take your time easing yourself into it. One method that can be useful in the beginning is to try to do it with, say, 10 things everyday. It may seem a little silly, and the answer to many may be quite obvious, but it will train your brain to do it automatically, which is invaluable. Not only has this made me a better natural navigator, but it has also made me a more conscientious person in my everyday life.
Mindsets to Avoid
Everyone knows not to panic when they get lost. Unfortunately, that’s easier said than done. When you realize you don’t know where you are, it can be scary and embarrassing, and this combination can be deadly. It is very important to get a hold of these emotions as quickly as possible, and start navigating with intent and precision. After reading this article, you have the tools you need, if you apply them correctly.
A good first step that I have found is to formulate a plan before anything else. This forces your mind into a state of logic and forces your emotions and senses to slow down as you sit and think. It will also make you more optimistic, as you now have something to work towards. Obviously this plan will need to be amended as soon as you get more information, but it was never really meant to get you out anyway. This plan is mostly to help you get into the right mindset to help yourself.
Another mindset to avoid is that of complacency. It is very easy to get complacent in the woods, especially if you’ve been navigating in the backcountry for a long time. You may feel that you can go anywhere without really having to focus, but this can cause problems. Remember that focus is necessary anytime that you are navigating off trail in forests or anywhere else that visibility is limited.
Now get out and use it!
Go to your nearest forest and look around for things you might recognize from this article. Practice the CMF principle! Send me an email at info@northernepics.com to let me know how it goes, or if you have any other questions regarding this article!
And if you’re ever in Denali, Alaska, book a tour with us and learn more than you could ever have expected about the Denali wilderness.
More Information on Natural Navigation
There are many brilliant books written on this topic, but I especially love Tristan Gooley’s work with books like “The Natural Navigator.” He has several great books that would be worth checking out if you’re interested in learning more about this wonderful subject!